AR Transaction Report
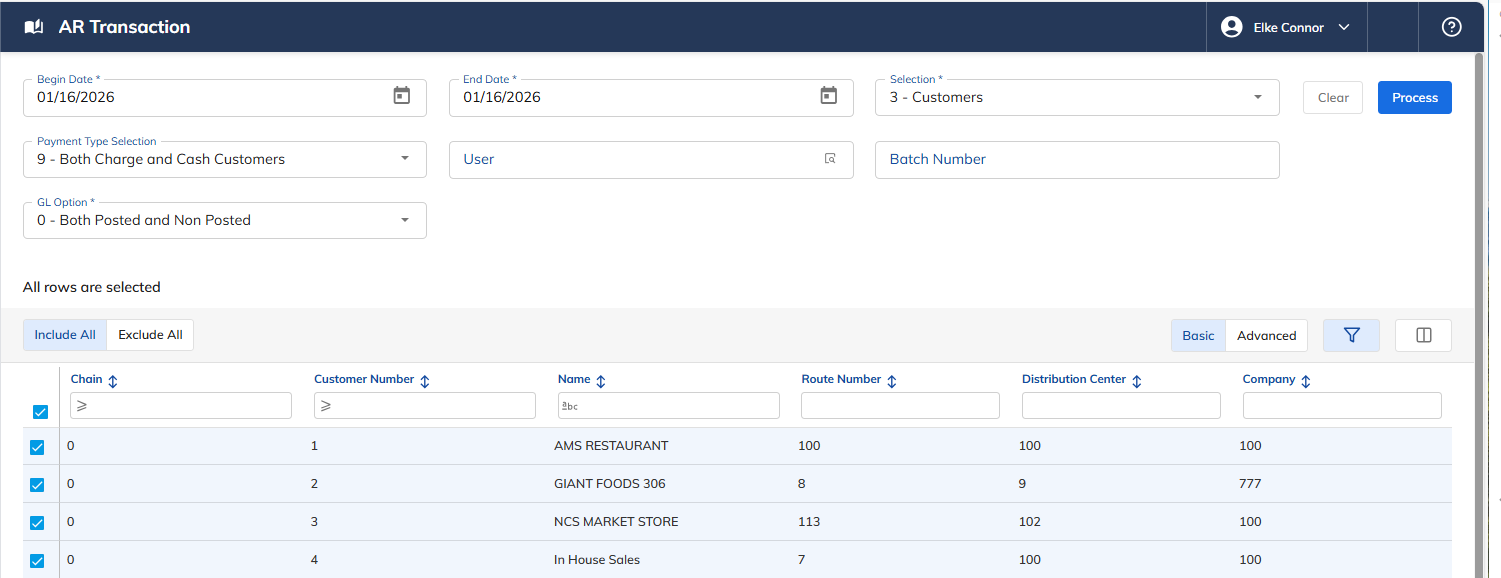
The purpose of the AR Transaction Report is for the user to run reports and balance the monies entered/collected with the actual deposit for the day(s). This article describes how to run the report by date range and refine it by selection type, pay type, user, batch, and G/L posting status.
AR Transaction Report
Select the AR Transaction Report link under the Accounts Receivable menu option.
Enter the beginning date.
Enter the ending date.
Selection to run report — choose one of the following:
1 – Distribution Centers
2 – Routes
3 – Customers
6 – Company
Select a Pay Type — choose one of the following:
1 – Cash Only
3 – Charge Only
9 – Both Charge and Cash Customers
Select a particular User. The default is the current user.
Enter the batch number (if there is one).
Select a G/L Option:
0 – Both Posted and Non-posted
1 – Posted
2 – Non-Posted

Once a selection is made, the following screen will appear based on the selection.
Include All — if you want to include all based on your selection (all Distribution Centers, Routes, Customers, and Companies), select it.
Exclude All — clears the user's selections and allows the user to begin the selection process again.
Or, the user can select random customers or a range of customers by clicking on the box on the left and paging through.
Once the selections have been completed, select Process.