
Create a Call Queue
This article shows how a user can create a Call Queue in xRMS. The Call Queue determines which customers are called for orders, based on order type, sequence, processing method, date, and the selected distribution centers or routes.
Create a Call Queue
Select Create Call Queue from the Order Menu option.
Once Create Call Queue is selected, the following screen will appear.
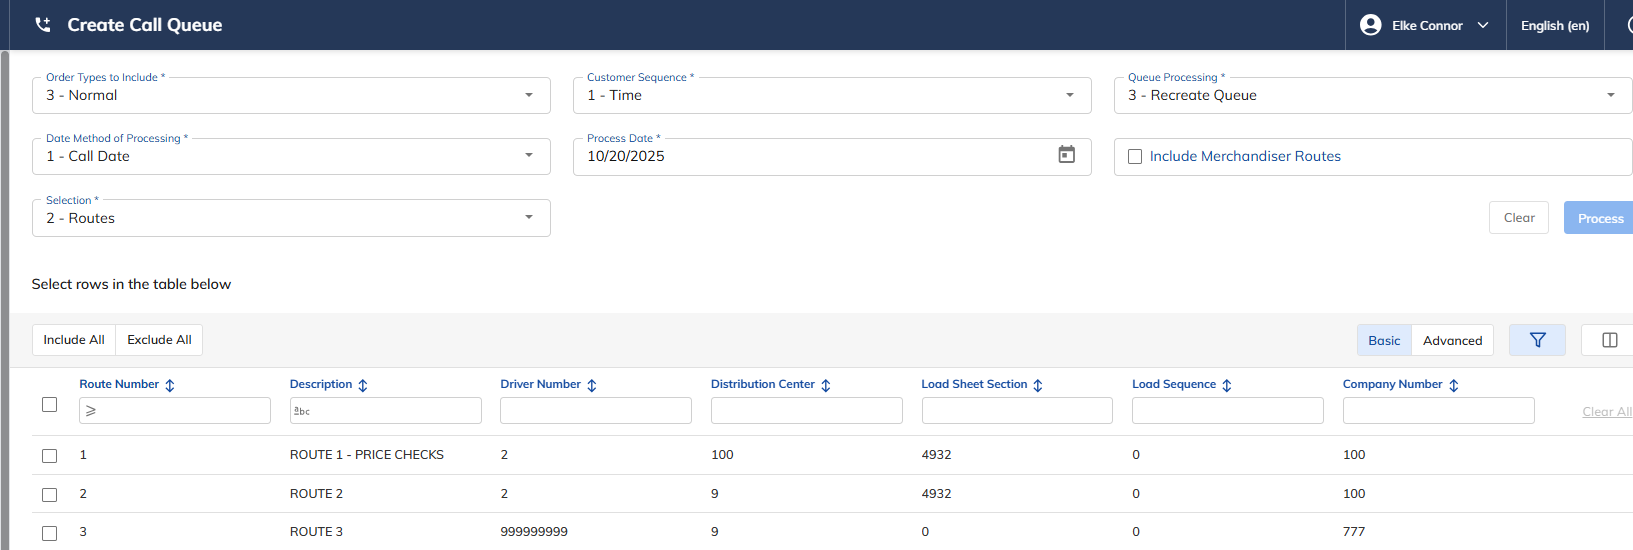
Select the Order Type to include — choose one of the following:
"1" - Build To
"2" - Normal
"3" - Peddle
"4" - Standard
Select the Customer Sequence — choose one of the following:
"1" - Customer
"2" - Stop Sequence
Select the Queue Processing:
"1" – Add to Existing Queue Avoid (duplicates)
"2" – Add to Existing Queue Allow (duplicates)
"3" – Recreate Queue
Select the Date Method of Processing — choose one of the following:
"1" - Call Date
"2" - Load Date
"3" - Delivery Date
Select the Process Date (MMDDYYYY).
Include Merchandiser Routes (Y/N).
Selection — choose one of the following:
"1" – Distribution Centers
"2" – Routes
Include All — based on your selection, include Distribution Centers OR Routes.
Exclude All — when manually selecting individual routes, you can restart the selection process by excluding all Distribution Centers or Routes.
Select Process to generate the Call Queue.
Once the Call Queue is processed, the following screen will display the Call Queue Results.
