
Create a Build-To Order
A Build-To order sets the par level for an item — the quantity that should remain on the customer's shelf after each delivery, rather than a fixed amount to deliver every time. Instead of manually deciding how much to leave, the driver's mobile system asks how many units are currently on the shelf and calculates how many are needed to bring the shelf back up to the par level. For example, if Item 100 (HG Milk) has a Monday par level of 50 units and the driver finds 20 units remaining in the cooler, the mobile system tells the driver to leave 30 units. This article walks through creating a Build-To order in Order Entry, setting the par level quantity for each item, and confirming the saved order.
Order Type Reference
Order Entry supports six order types. This article covers Build-To (code 1).
| Code | Order Type |
|---|---|
| 1 | Build-To — replenishes each item on the customer's shelf up to a set par level at every delivery |
| 2 | Pick_Up |
| 3 | Pre-Order |
| 4 | Peddle Order |
| 5 | Standard Order |
| 10 | Load Build-To |
Before You Begin
Prerequisites
The customer already has an active Route assigned with a saved weekly delivery schedule.
You have Order Entry permissions in xRMS.
The items being ordered are already set up in Item Maintenance with current pricing.
You know the par level — the target shelf quantity — for each item on this customer's Build-To order.
Step-by-Step Instructions
Step 1 — Select the Customer
Go to Order Menu → Order Entry.
In the Customer field, search for and select the customer (for example, 0-1 - AMS RESTAURANT).
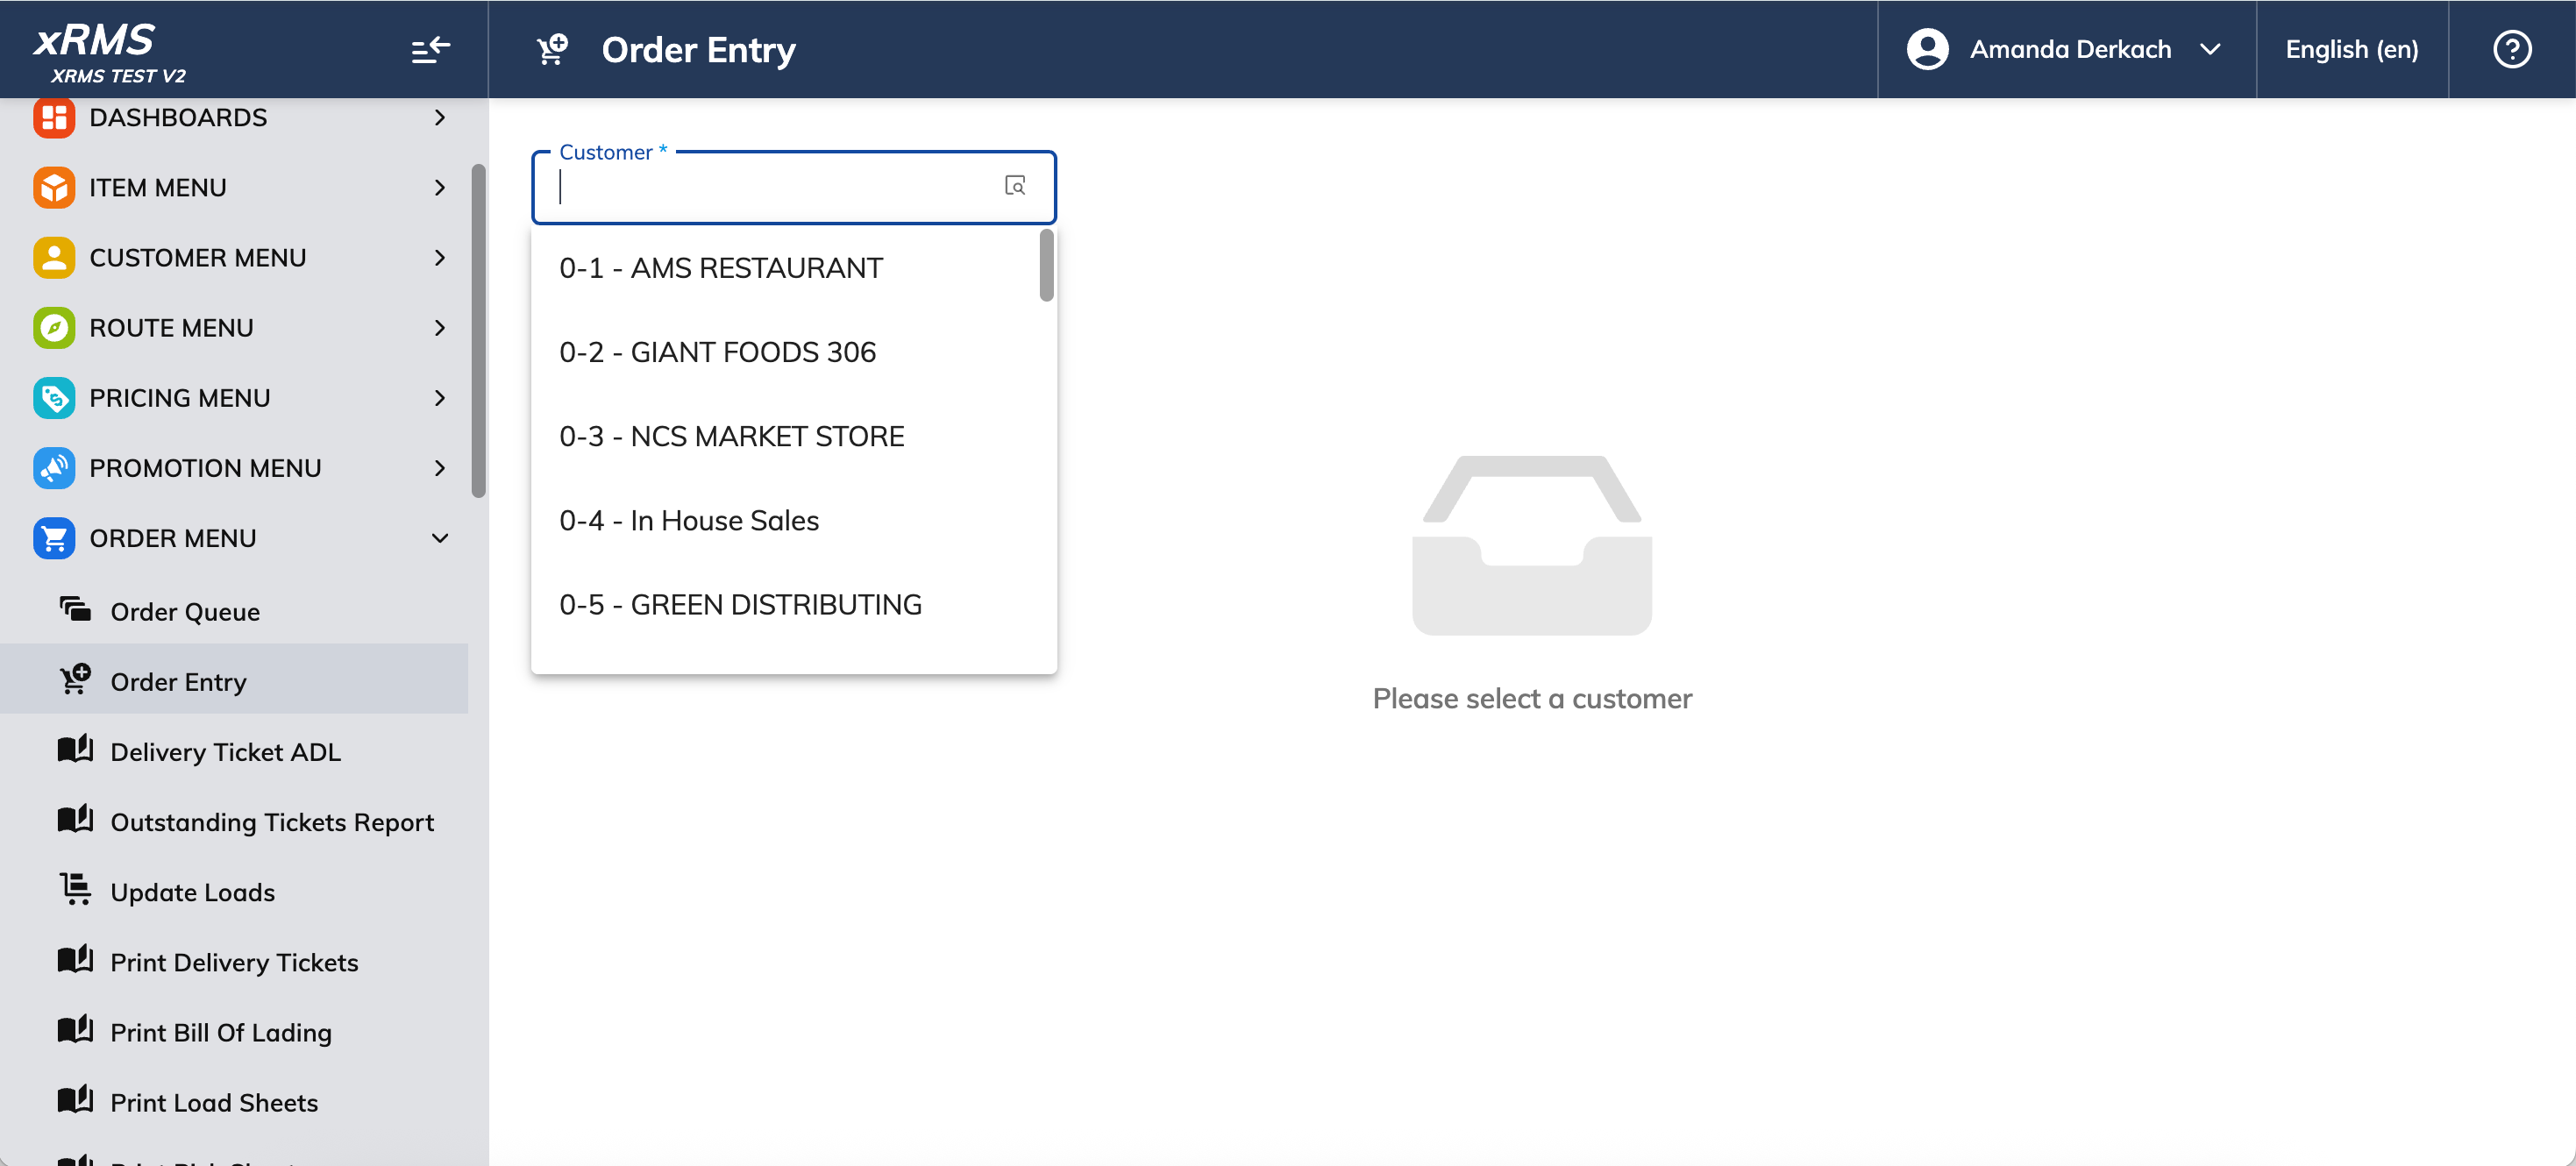
Figure 1: Order Entry — search and select the customer.
Chain Number and Customer Number populate automatically, and the Scheduled Delivery, Unscheduled Delivery, and Previous Orders sections appear.
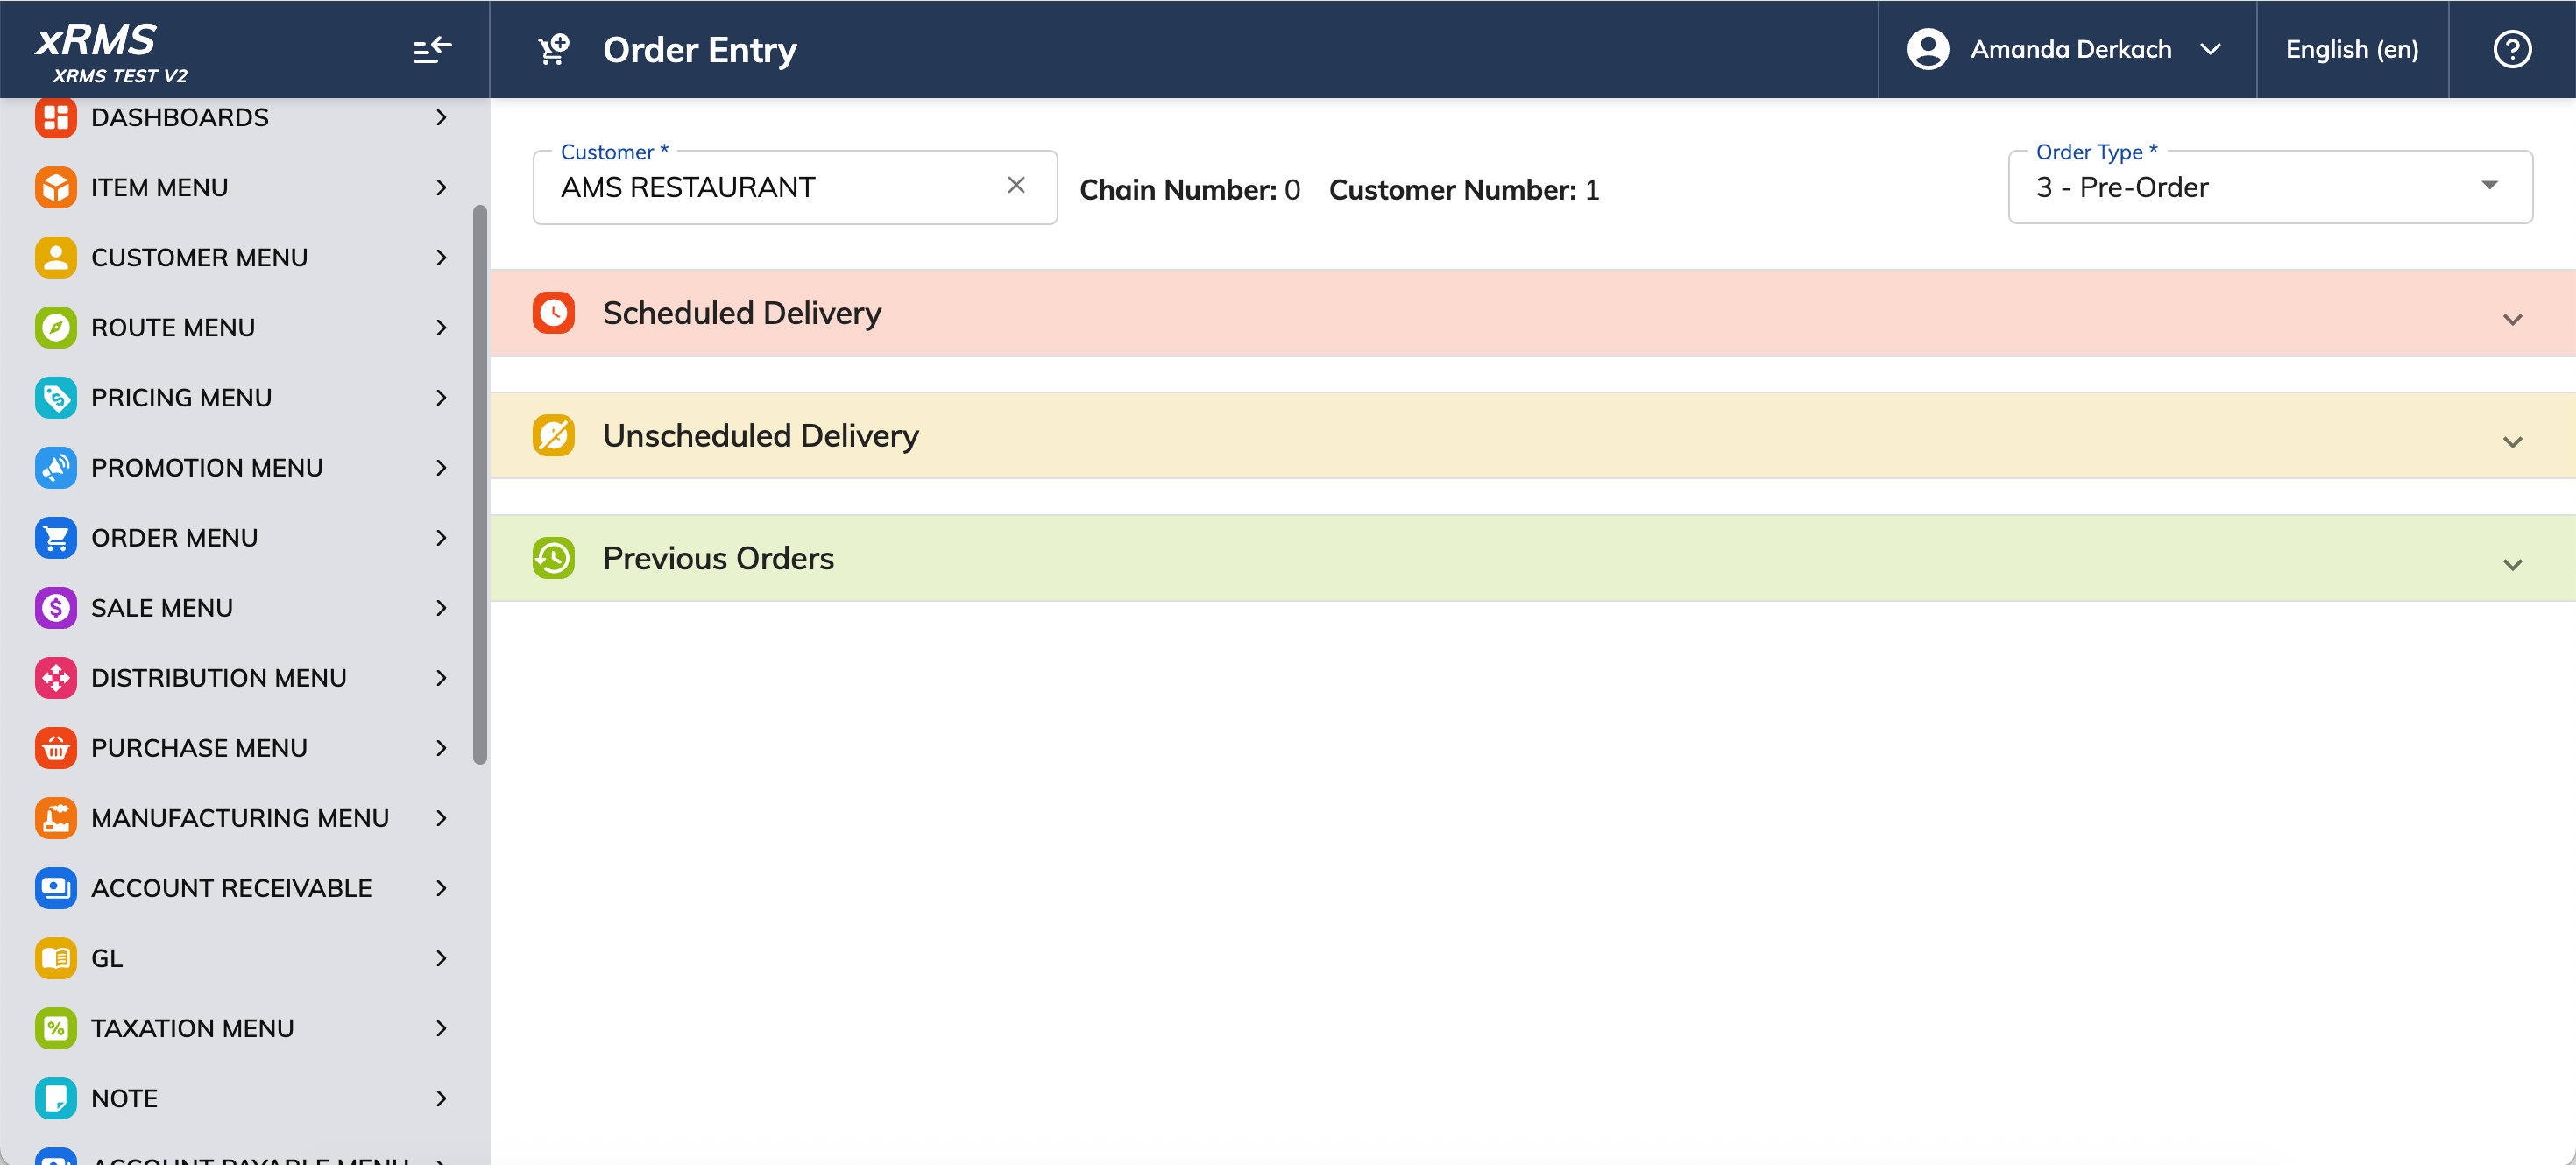
Figure 2: Customer selected — Chain Number, Customer Number, and Order Type appear.
Step 2 — Set the Order Type to Build-To
Open the Order Type dropdown at the top right.
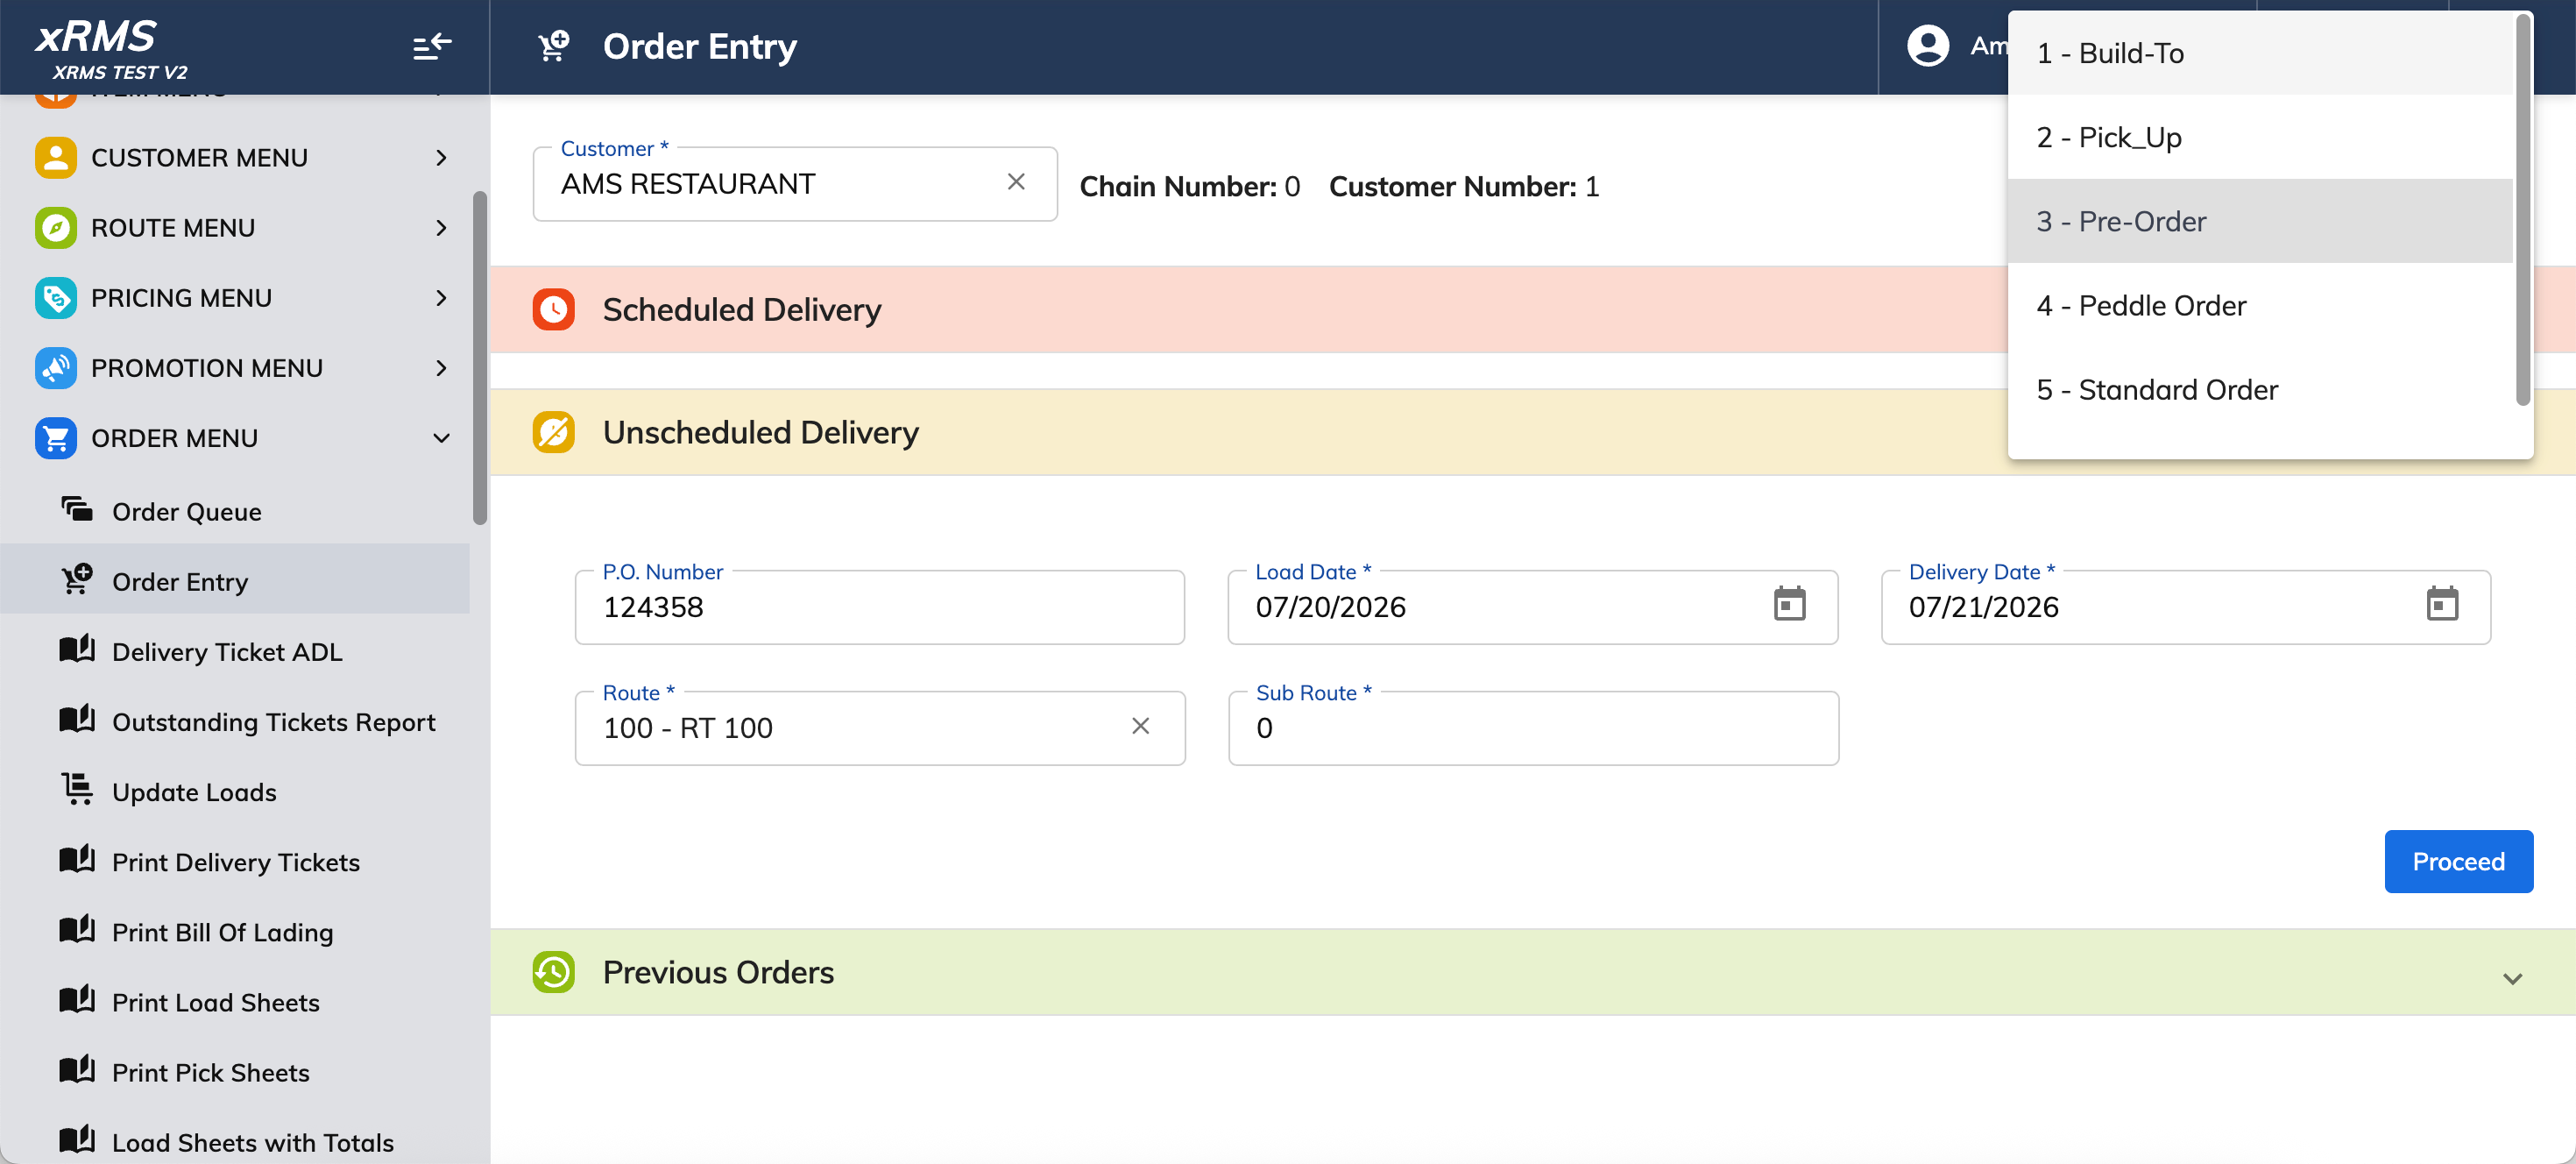
Figure 3: The Order Type dropdown.
Select "1 - Build-To." The Weekly Schedule section replaces the Unscheduled Delivery fields.
Step 3 — Set the Weekly Delivery Schedule
Confirm the Route, Route Version, Effective Date, and End Date in the Weekly Schedule section.
Set the delivery days for Week 1 (and Week 2 if the customer runs a two-week cycle) using the day checkboxes, or use the Select delivery days toggle for a given day.
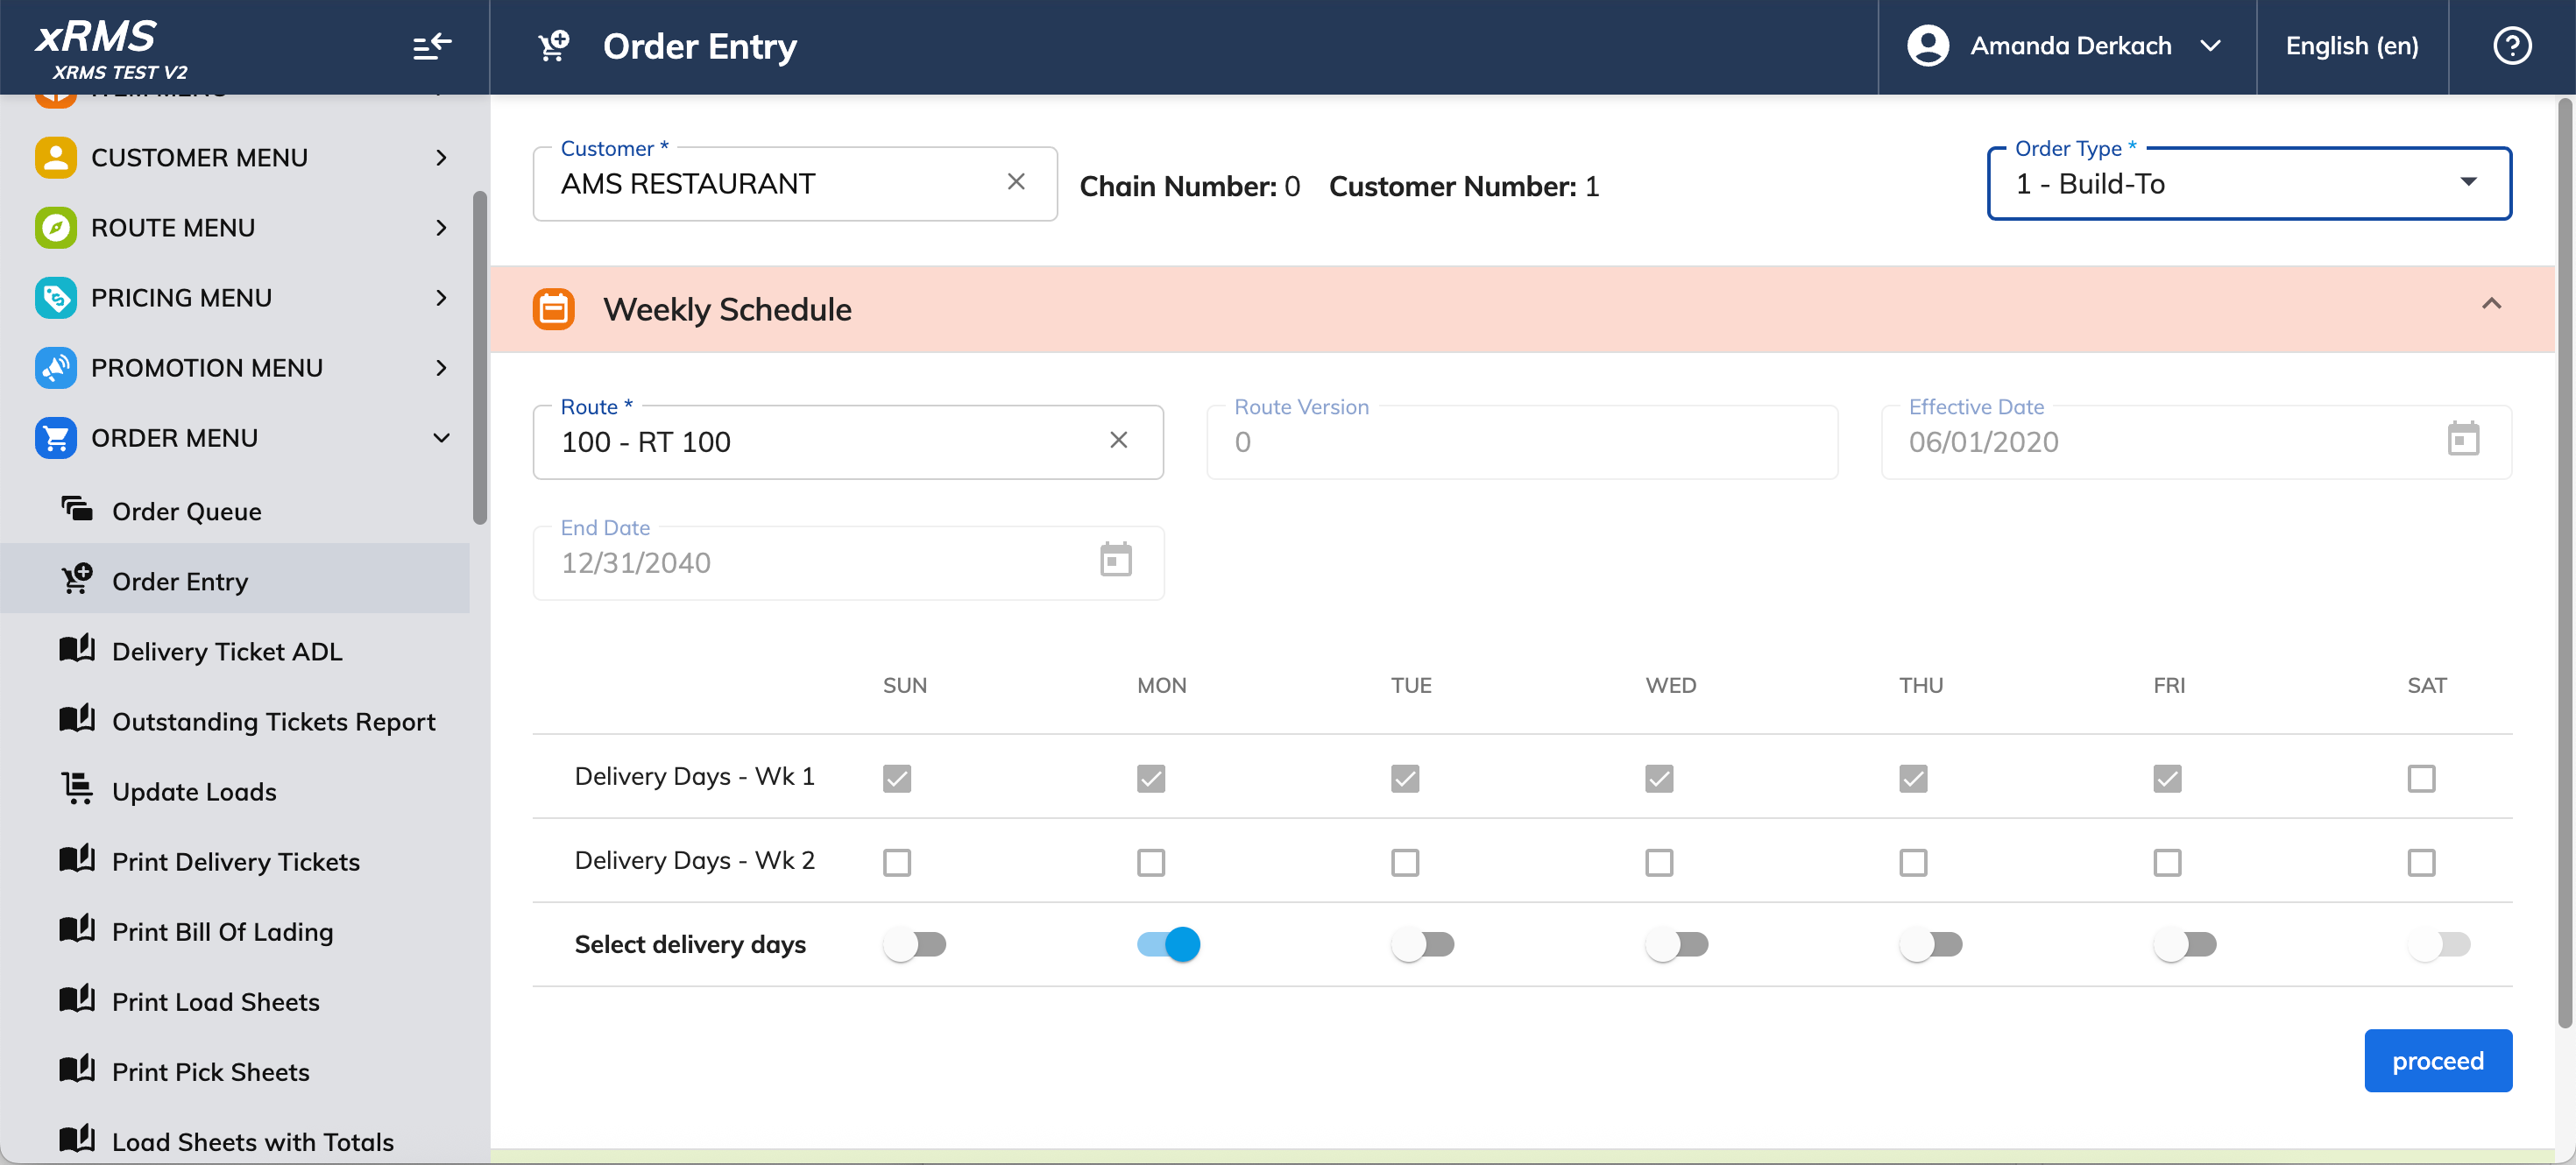
Figure 4: Order Type set to 1 - Build-To — the Weekly Schedule section replaces Unscheduled Delivery.
Step 4 — Add Notes (Optional)
Expand Notes to add a Contact Name, P.O. Number, or Driver / Ticket / Trailer notes if needed.
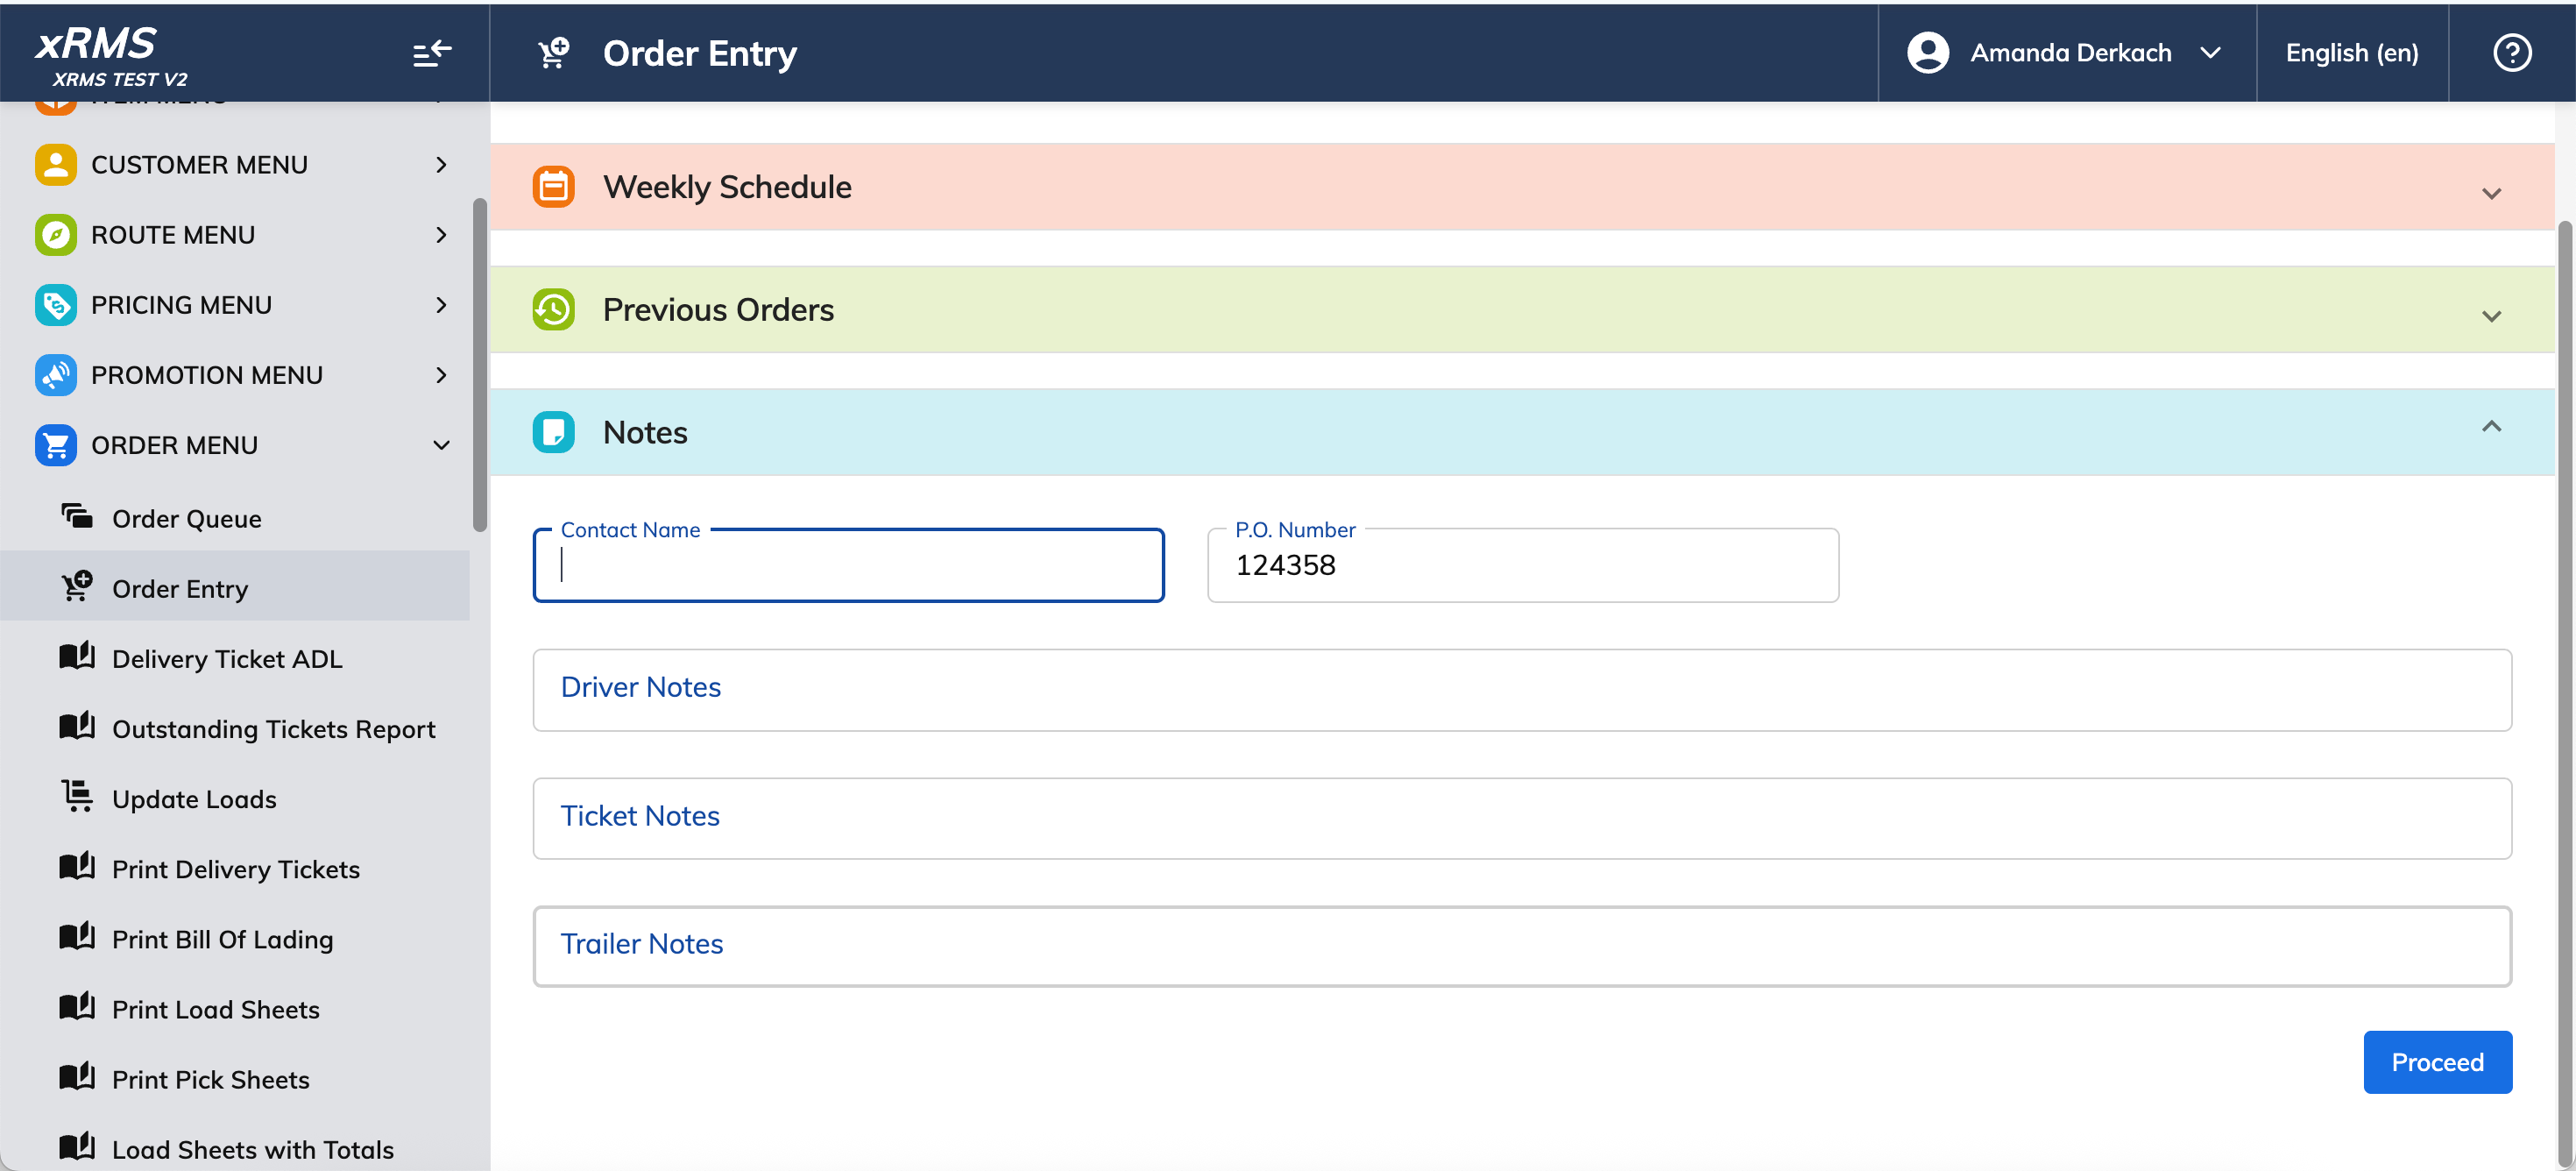
Figure 5: Optional Notes section — Contact Name, P.O. Number, and Driver / Ticket / Trailer notes.
Click Proceed to open Order Details.
Step 5 — Set the Par Level for Each Item
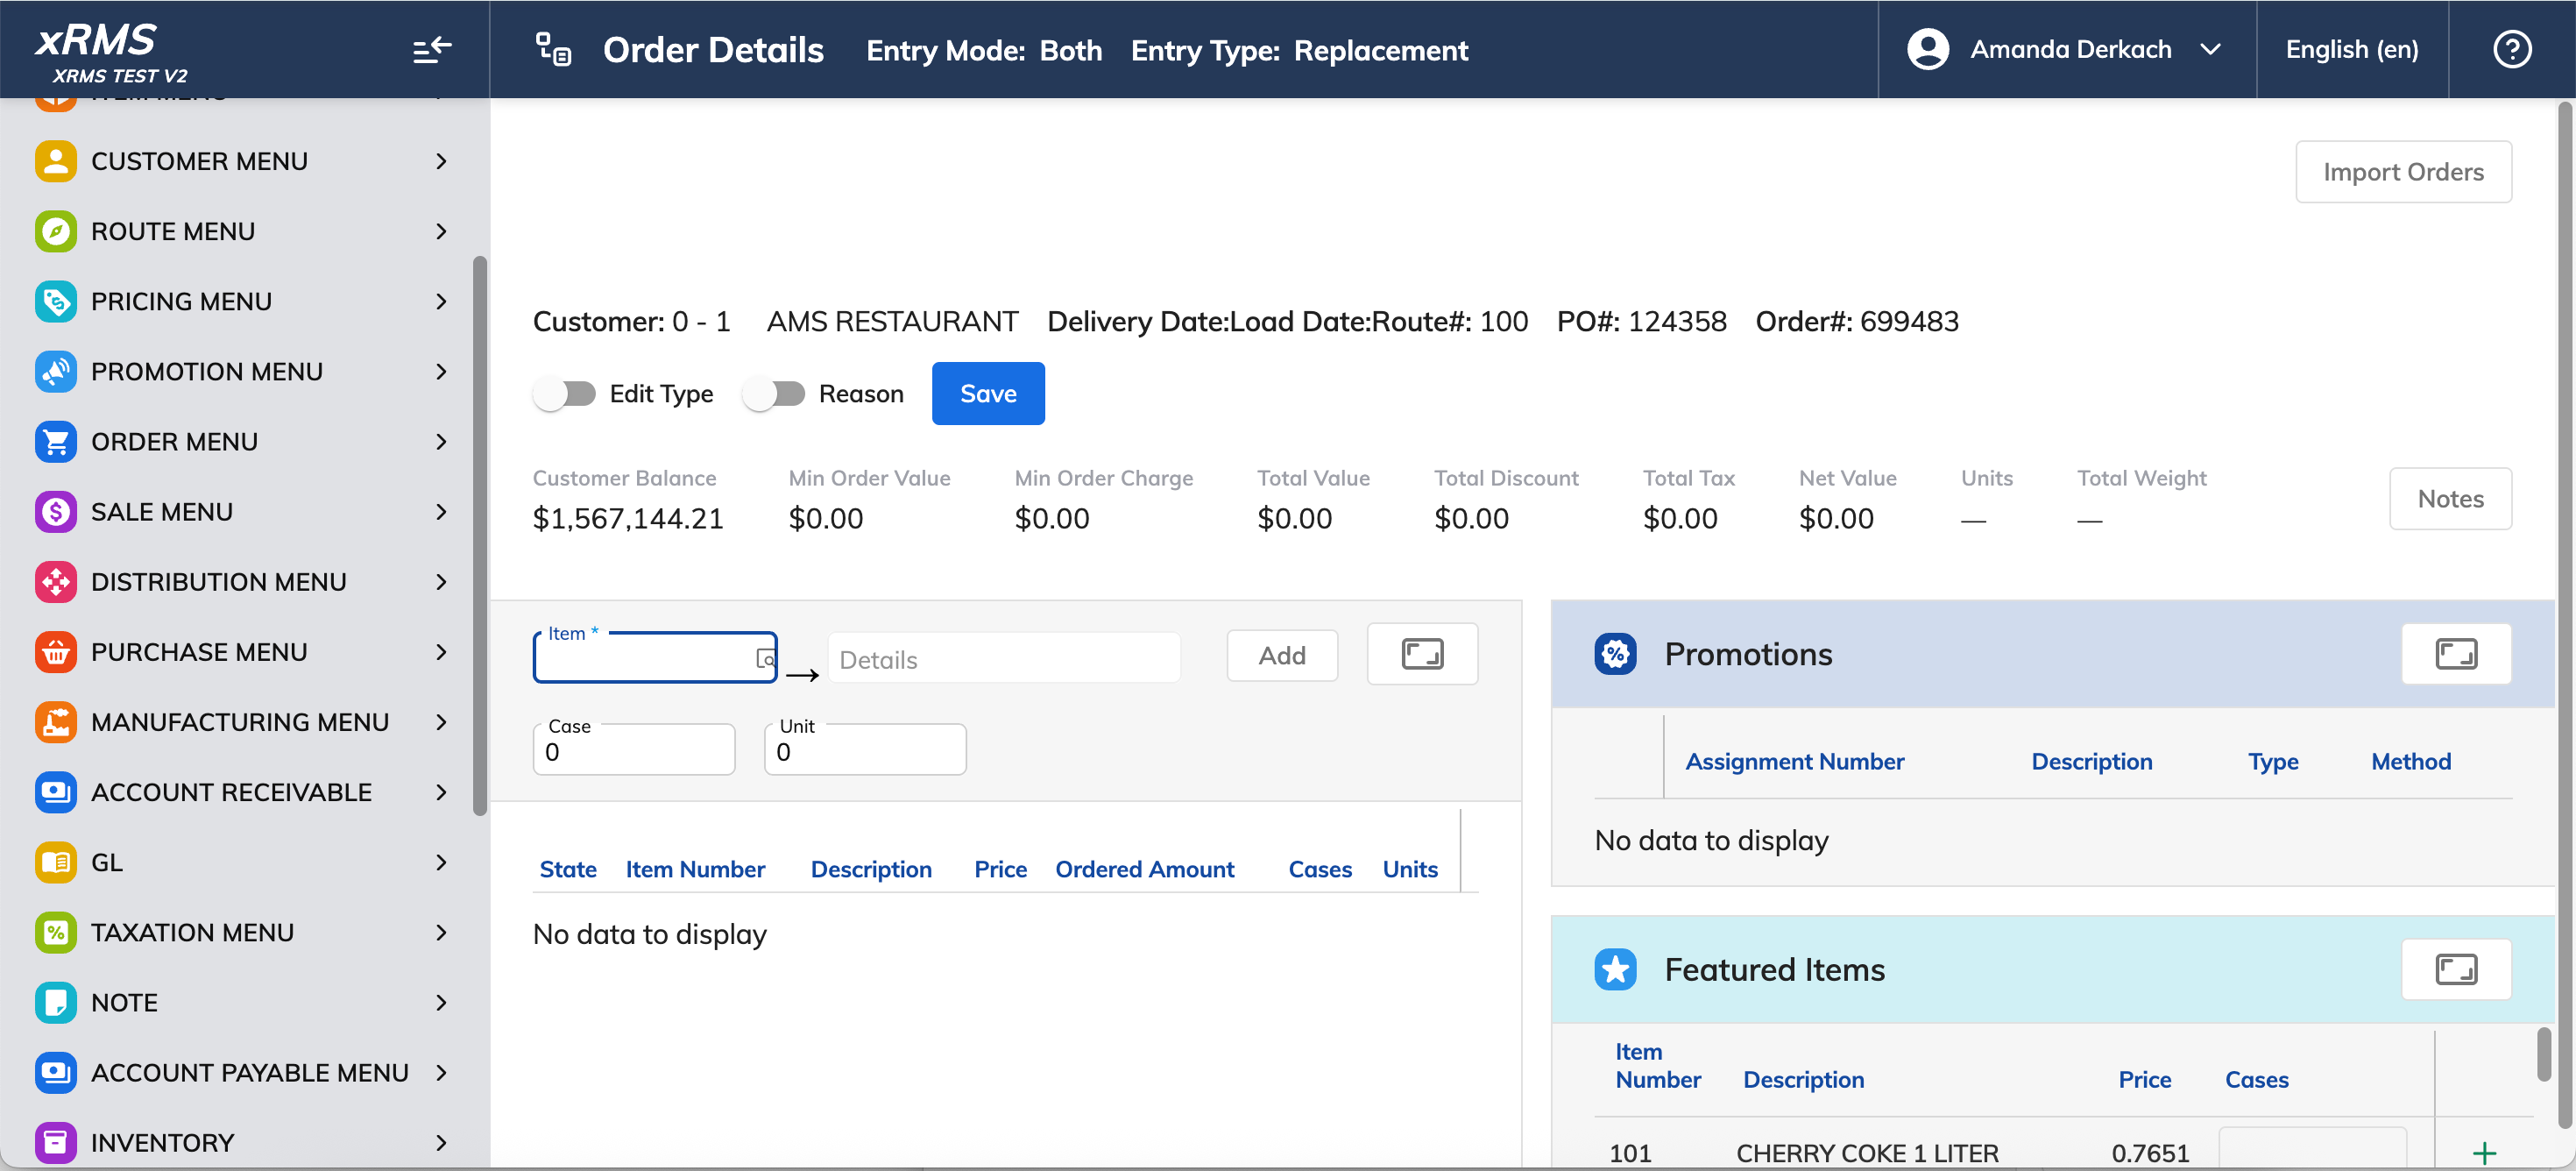
Figure 6: Order Details screen after clicking Proceed — ready for items.
Click into the Item field to open the Select Item picker, and search by Item Number, Description, or UPC.
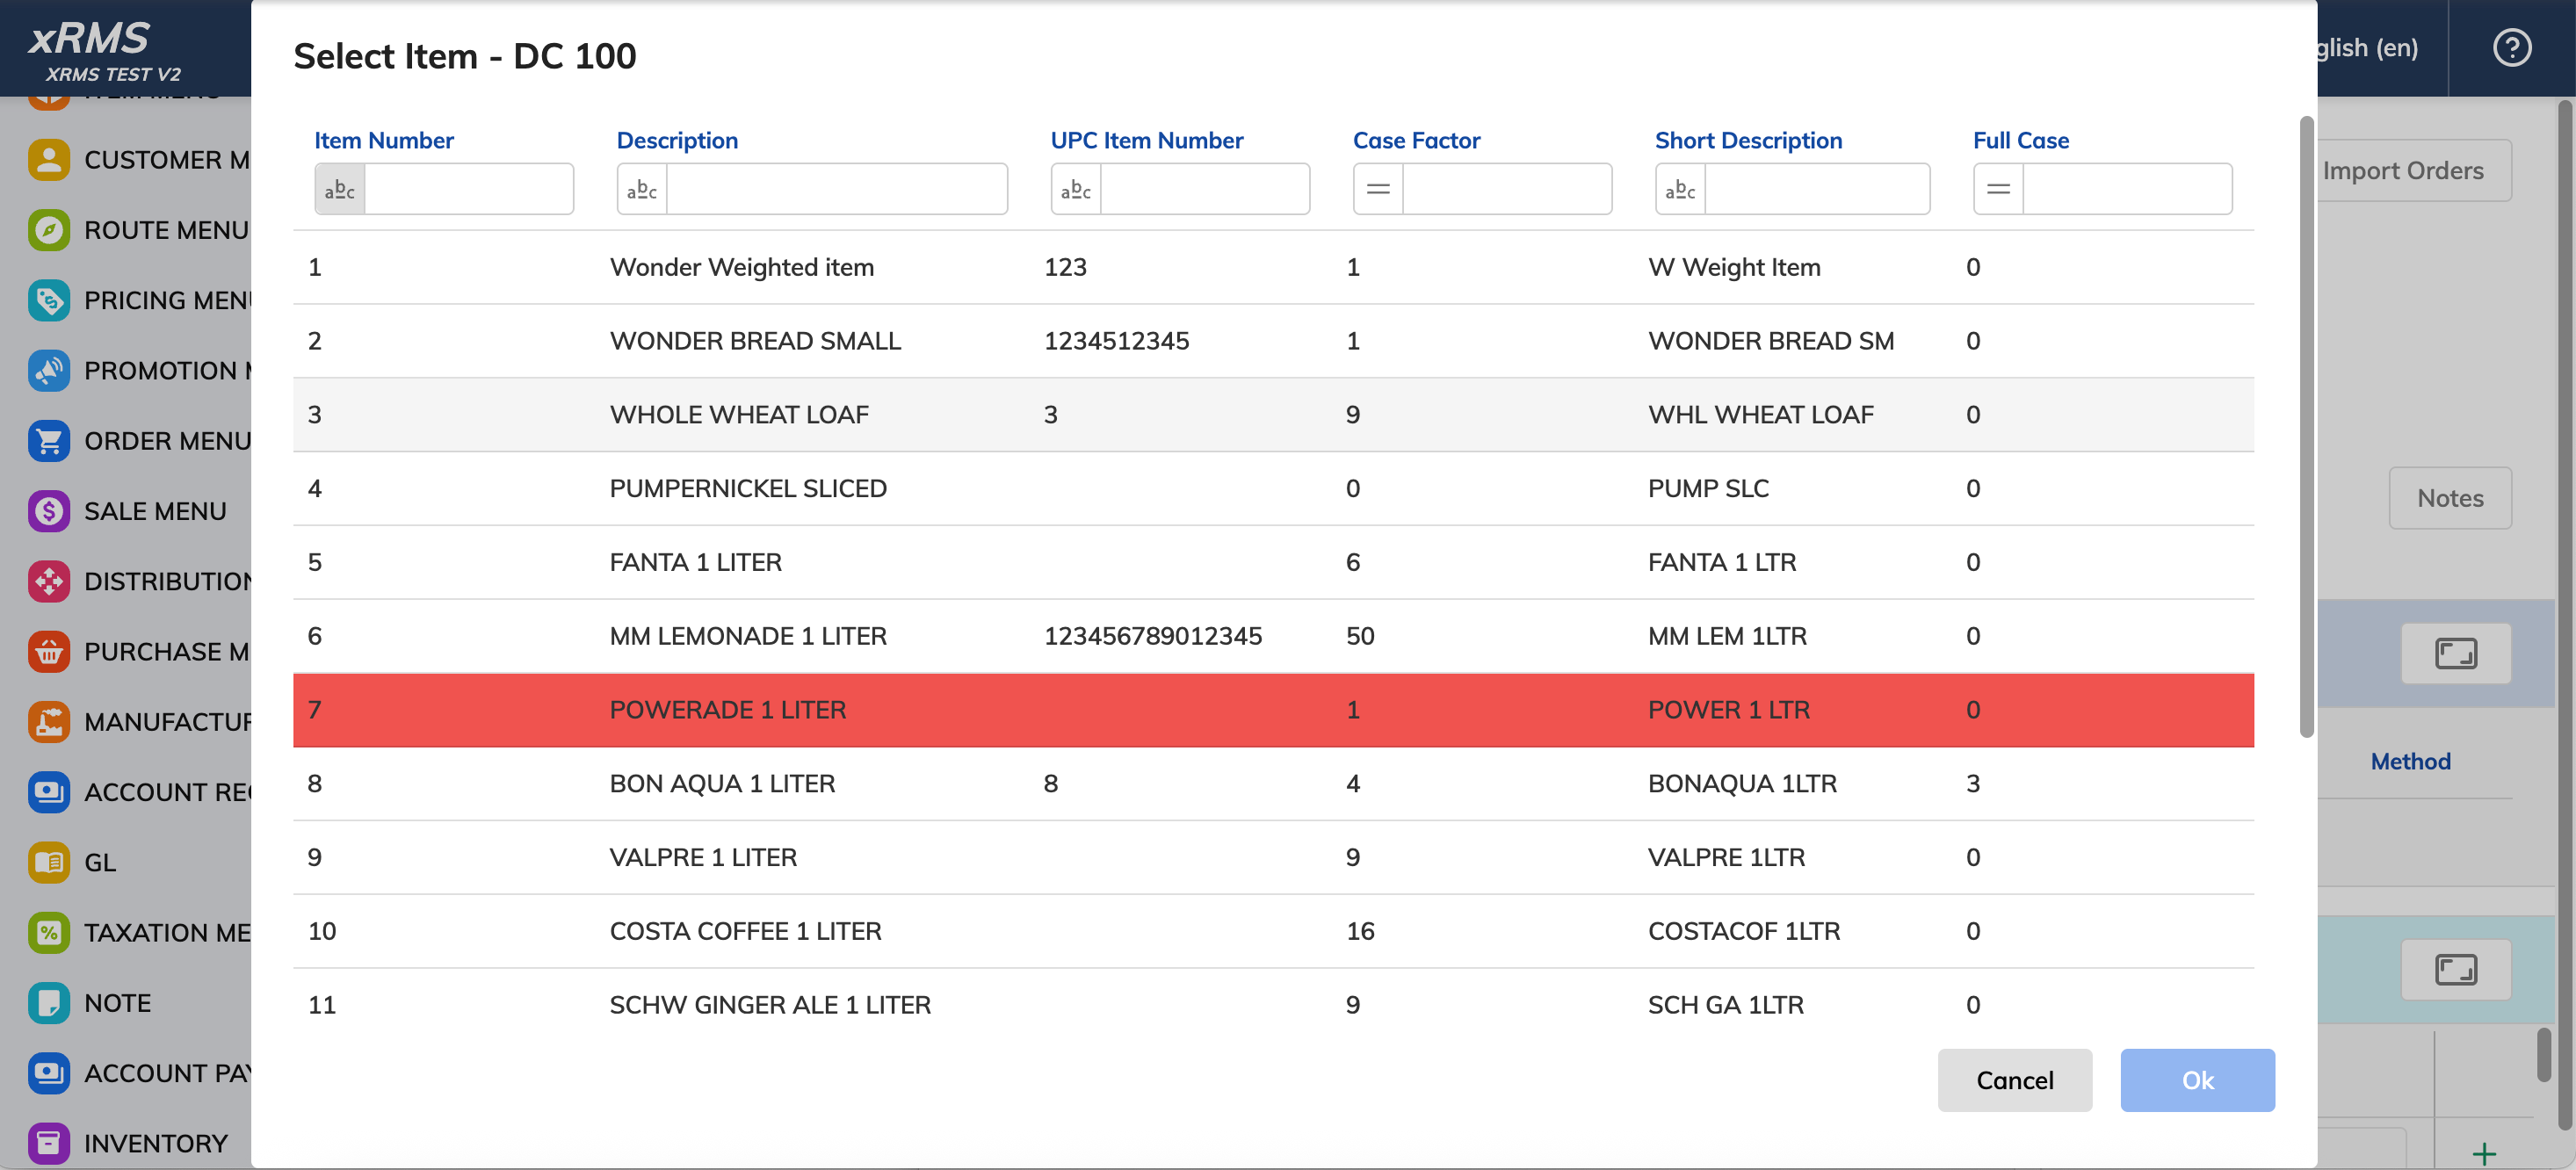
Figure 7: Select Item picker — search by Item Number, Description, or UPC.
Choose the item. The Item field and description populate.
Enter the par level quantity in Case (or Unit) — the quantity that should remain on the shelf after each delivery, not a one-time order amount.
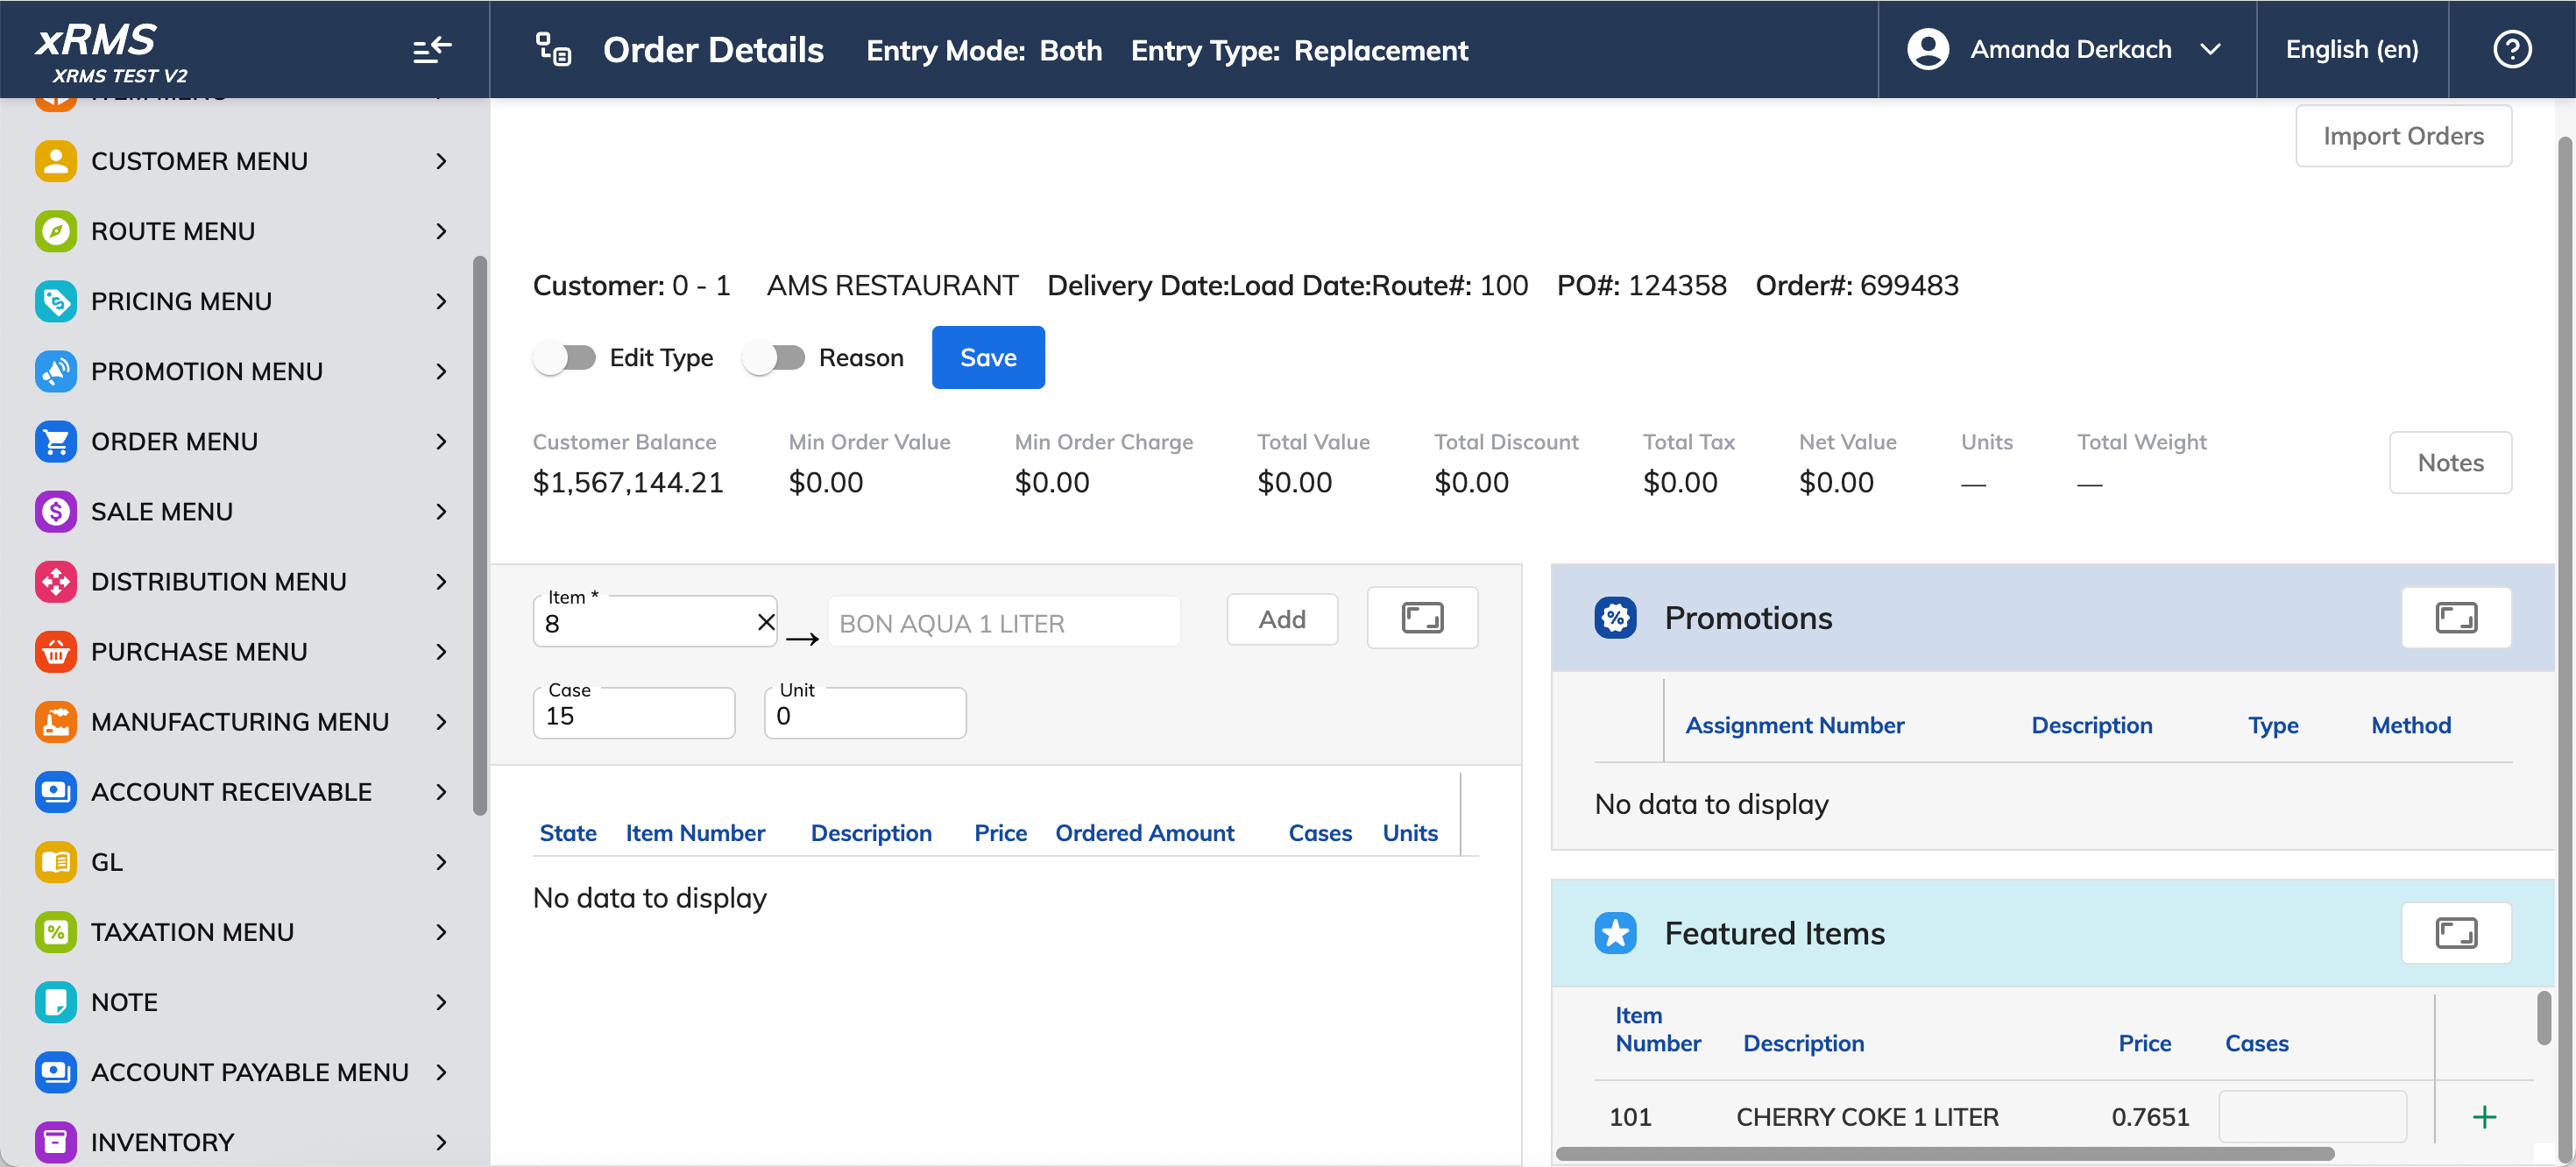
Figure 8: Item selected — enter the quantity in Case or Unit.
If Item 100 (HG Milk) has a par level of 50 and the driver finds 20 units remaining on the shelf, the mobile system will prompt the driver to leave 30 units — bringing the shelf back up to 50.
Click Add. The item appears in the order grid with its par level, and the running totals update.
Repeat for each additional item, setting its own par level.
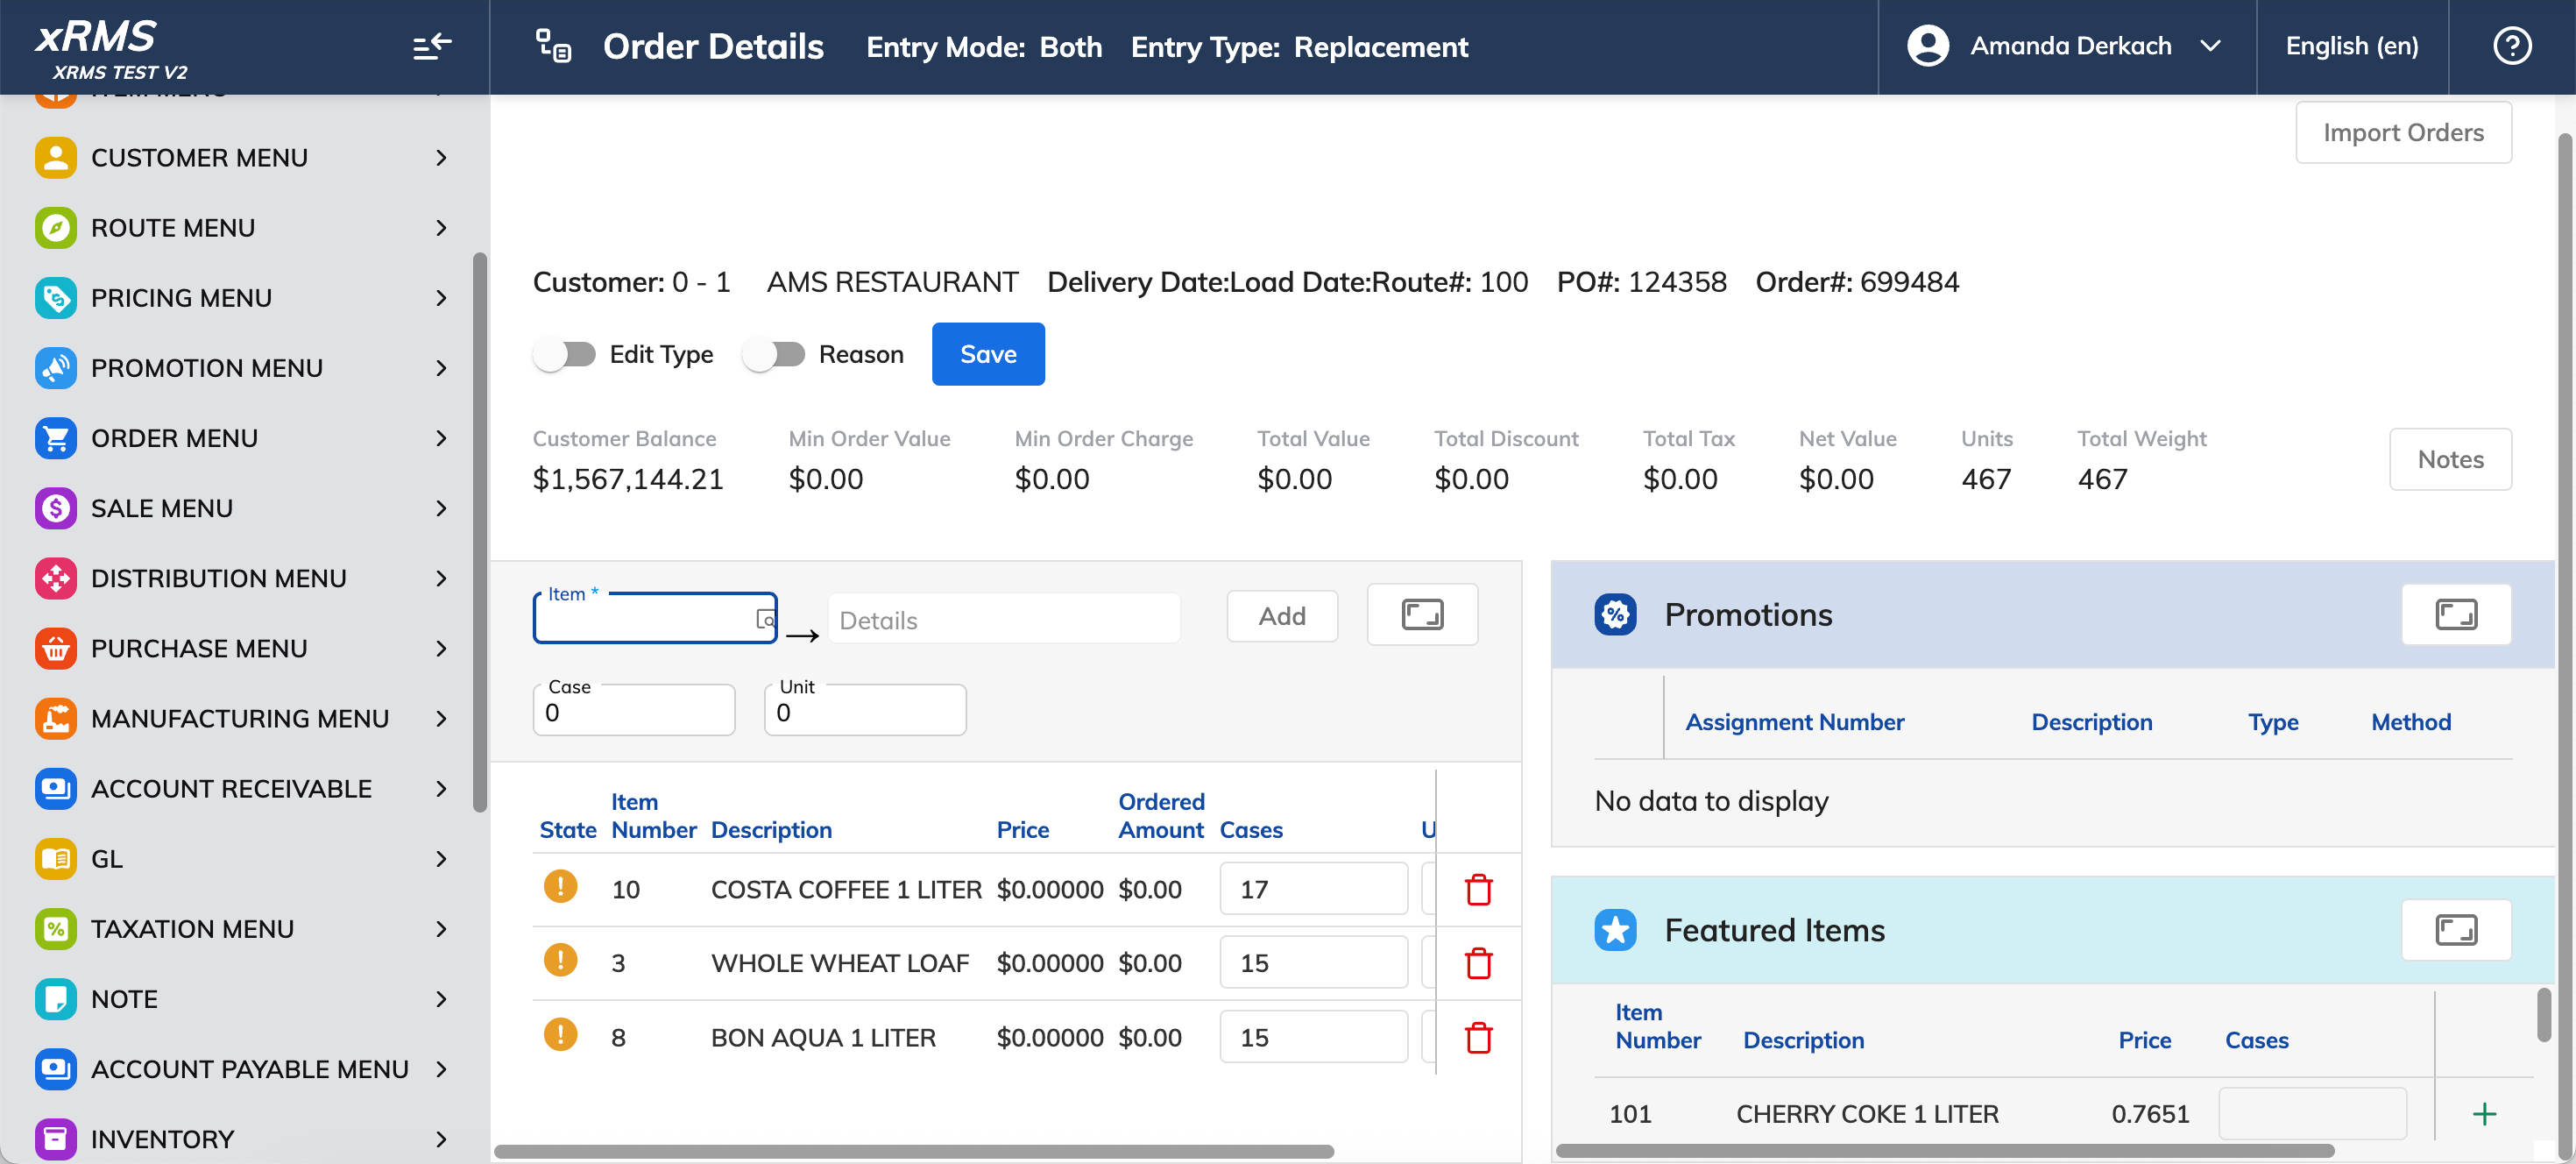
Figure 9: Multiple items added — Total Units and Total Weight reflect the full order.
Step 6 — Save the Order
Check the running Total Value, Units, and Weight at the top of the screen.
Click Save. xRMS assigns the Order Number.
Step 7 — Confirm the Saved Order
Return to Order Entry for the same customer and expand Previous Orders.
In the Type filter under Previous Orders, choose "1 - Build-To."
The order list will not show the new order as expected unless this Type filter is set.
The new order appears with Type "1 - Build-To," along with its P.O. Number, Load Date, Delivery Date, and Route. From there it can be viewed, copied, edited, or deleted using the row icons.
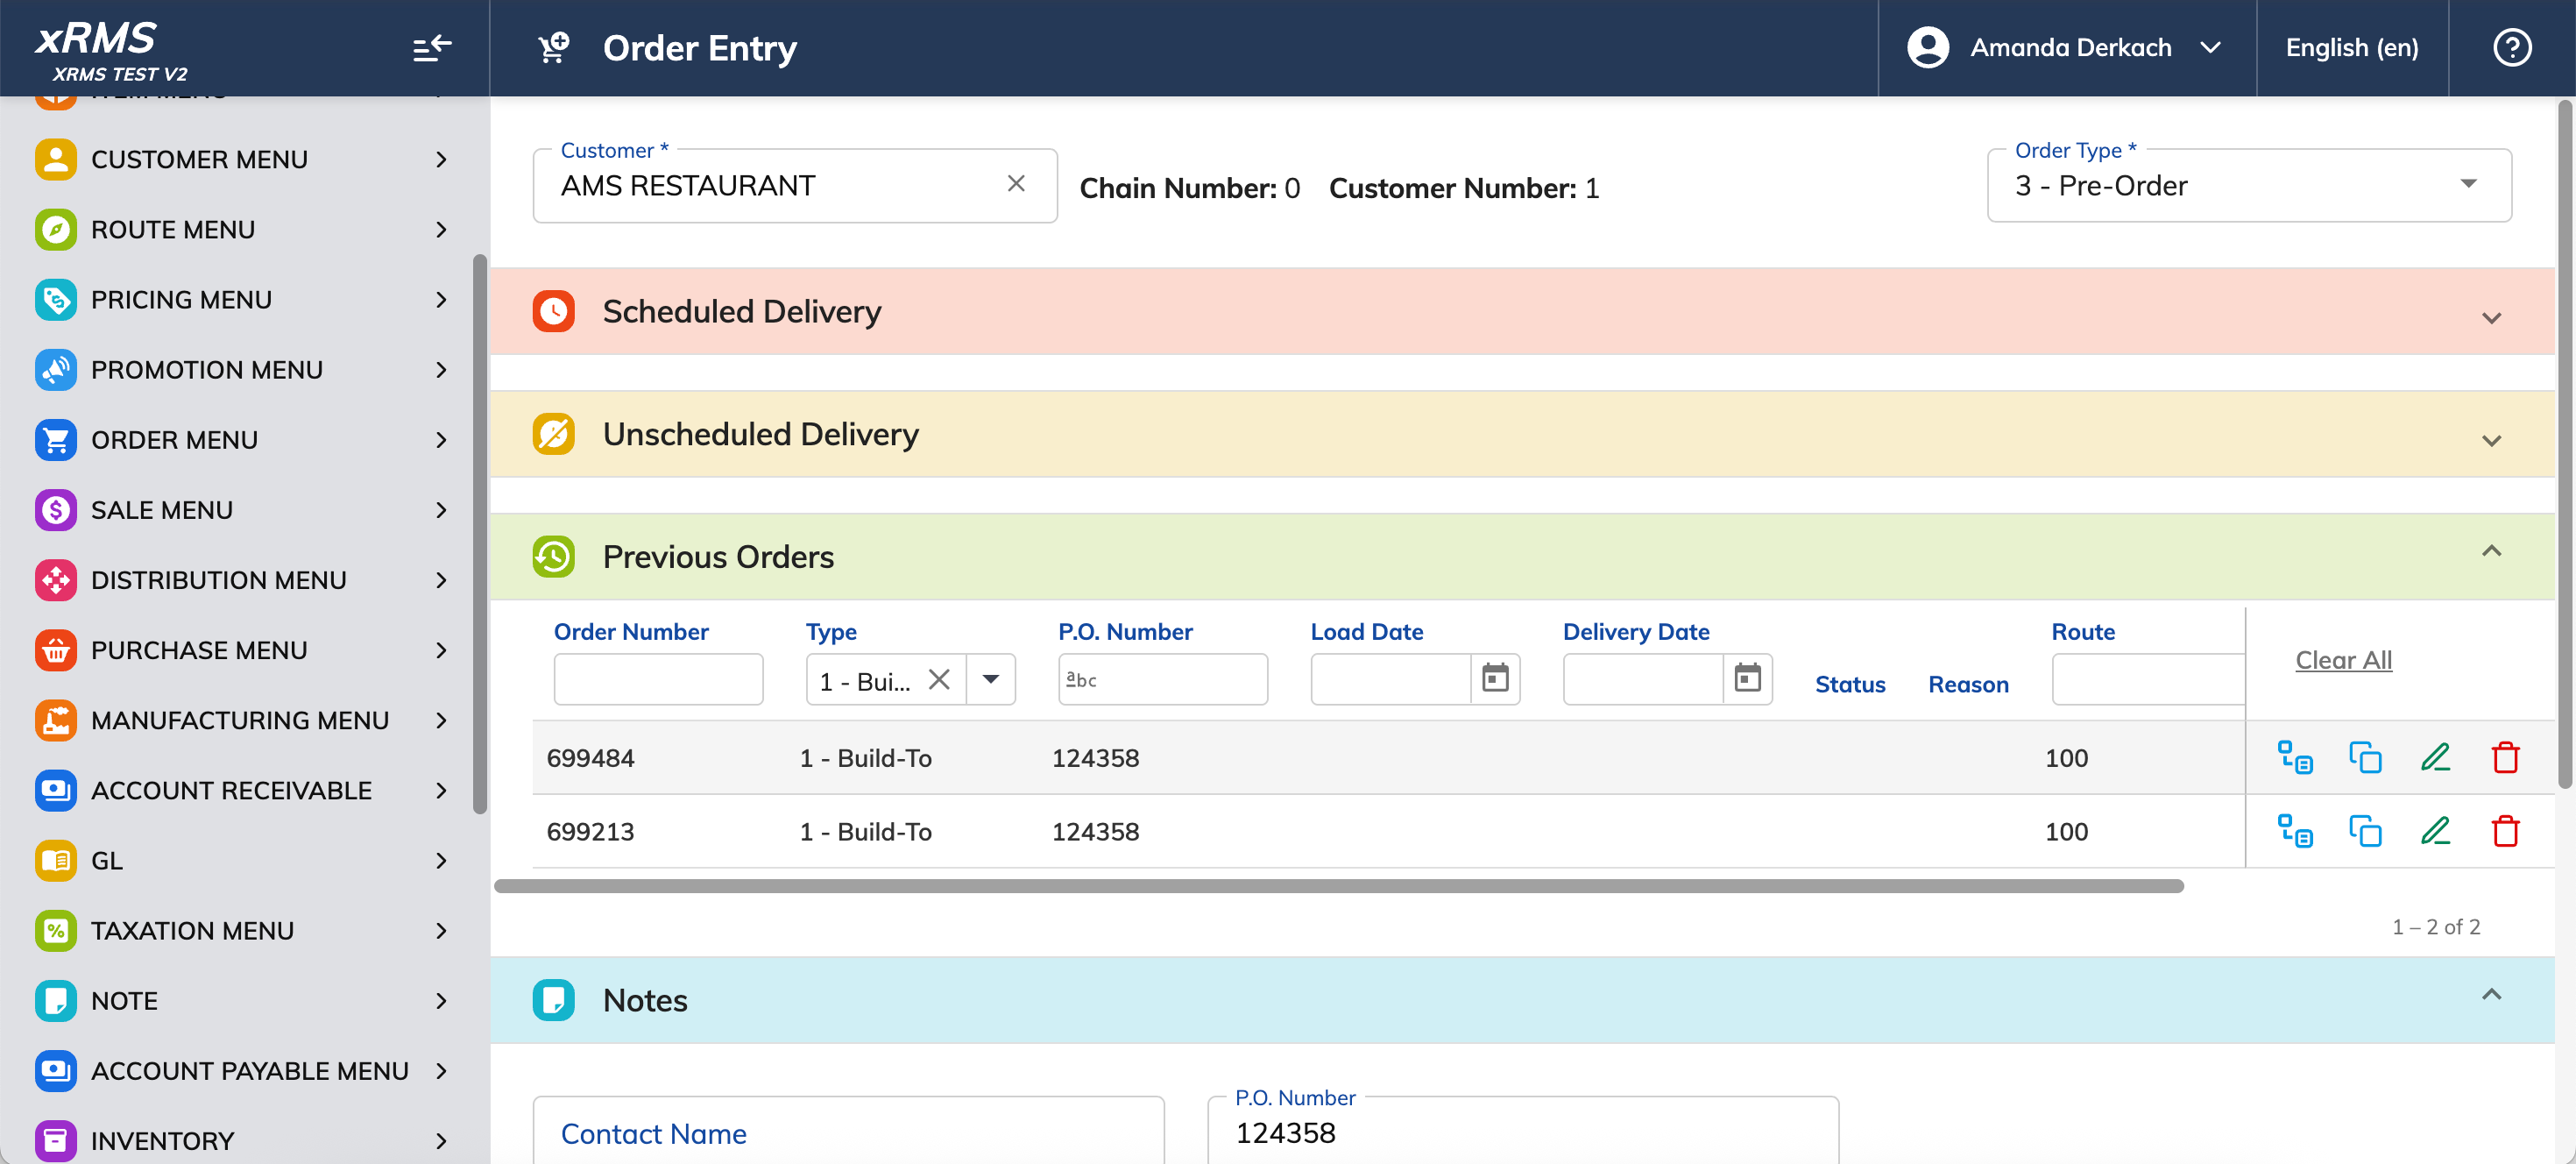
Figure 10: Previous Orders — the saved order appears as Type "1 - Build-To."
Source document: "How to Create a Build-To Order in xRMS," version 1.0 — Author: Amanda Derkach — Effective 07/20/2026.