Route Version Maintenance
Route Version Maintenance links a Route Number to a Route Version and sets the start and end dates for that Route/Version. Because many route businesses are seasonal, customer groupings, call frequencies, and delivery days change throughout the year — and during holiday weeks — so each Route/Version combination (a Route Time Table) has its own effective and end dates, letting customers move from one call-and-delivery pattern to another automatically. This procedure is also used to assign Chain/Customer Numbers to a Route Number/Version and to specify the Telesales Order Entry Representative responsible for calling the customers on each Route Version.
Create a New Route Version
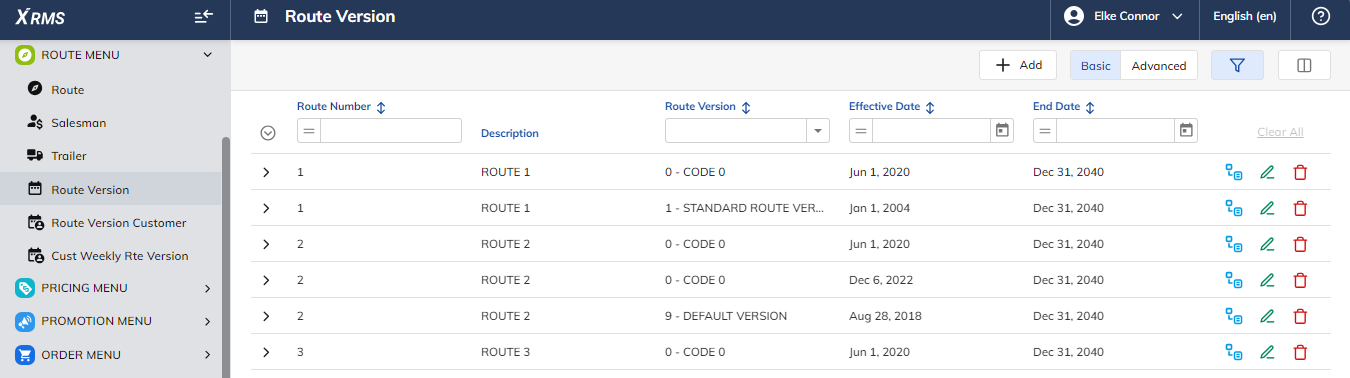
Select the Route Version hyperlink under the ROUTE MENU.
Select the + ADD button to create a Route Version.
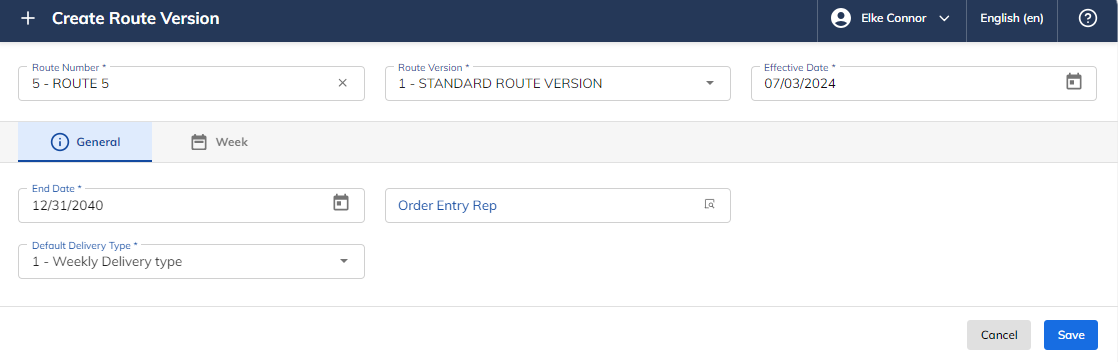
Enter the following entry fields on the General tab.
Entry Fields
Field | Description |
|---|---|
Route Number | Identifies the Route Number. |
Route Version | Identifies the version of the route. |
Effective Date | Identifies the effective date of the route version. |
End Date | Identifies the end date of the route version. |
Order Entry Rep | Select the Order Entry Rep for this particular Route Version to be used with the Call Order Queue. |
Default Delivery Type | Select the default delivery type for each customer that will be added to the Route Version. |
Next, complete the Week tab:
Select the Week tab.
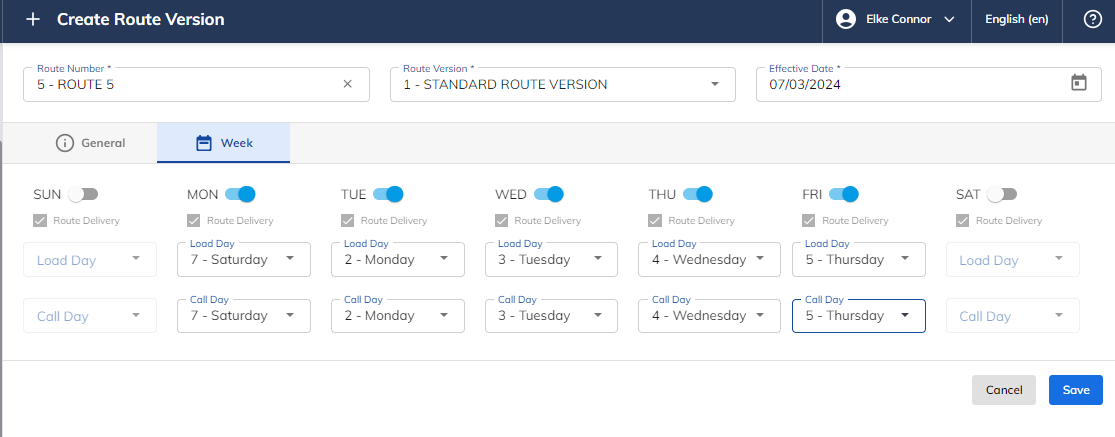
Enter the following entry field information on the Week tab.
Entry Fields on the Week Tab
Field | Description |
|---|---|
Delivery Days | Select the Delivery Days – Sunday through Saturday. |
Load Date | Select the Load Date for each Delivery Day. |
Call Day | Select the Call Day for each Delivery Day. |
Press Save.
Create a New Customer Route Version
From the xRMS Main Menu, select the Route Version Maintenance hyperlink under the ROUTE MENU menu option.
Select the Route Number and Version to begin adding customers.
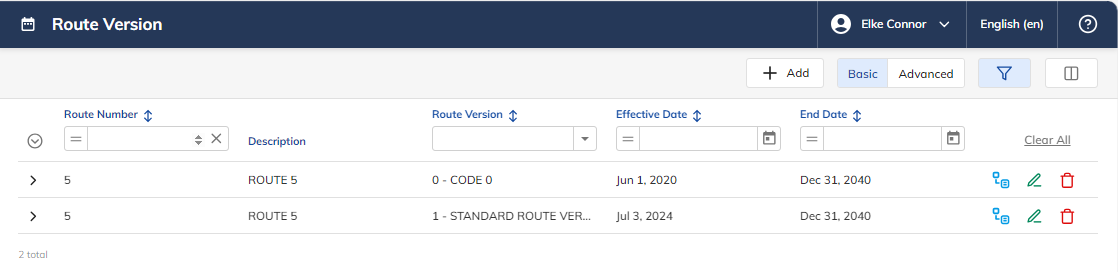
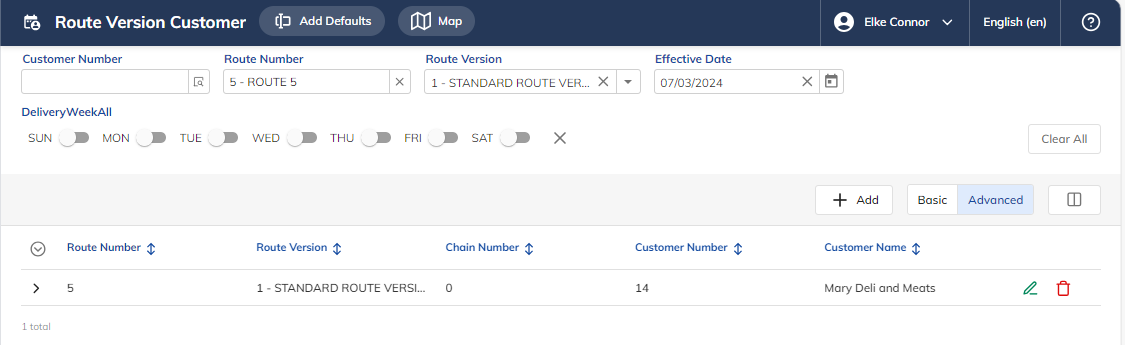
Once the Route Number and Version are selected, the following screen appears. Press Add.
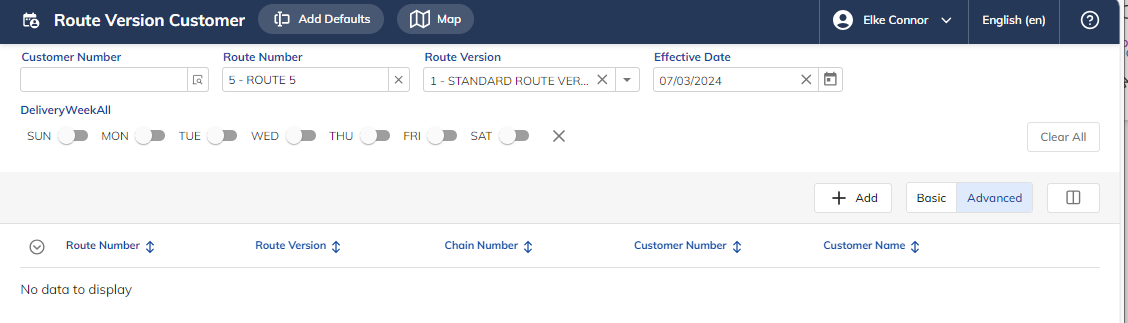
The following screen will appear:
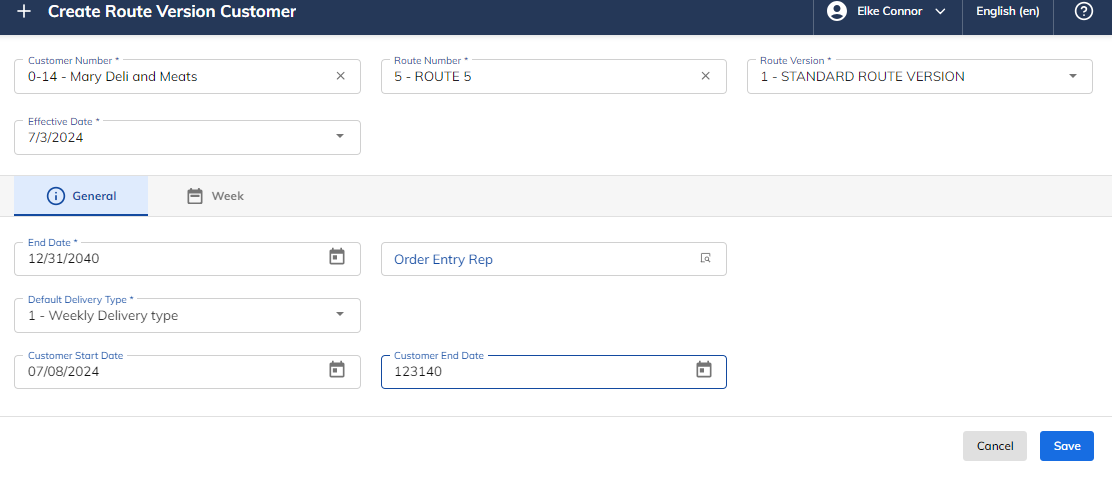
Entry Fields on the General Tab
Field | Description |
|---|---|
Chain/Customer Number | Select the Chain or Customer Number. |
Route Number | Route Number is populated from the prior screen. |
Route Version | Route Version is populated from the prior screen. |
Effective Date | Effective Date is populated from the prior screen. |
End Date | End Date is populated from the prior screen. |
Order Entry Rep | Select the Order Entry Rep for this particular Route Version to be used with the Call Order Queue. |
Delivery Type | Select the Delivery Type, if different than the default delivery type. |
Start Date | Customer Start Date – enter the Chain or Customer Number start date. |
End Date | Customer End Date – enter the Chain or Customer Number end date. |
Go to the Week tab to select delivery days.
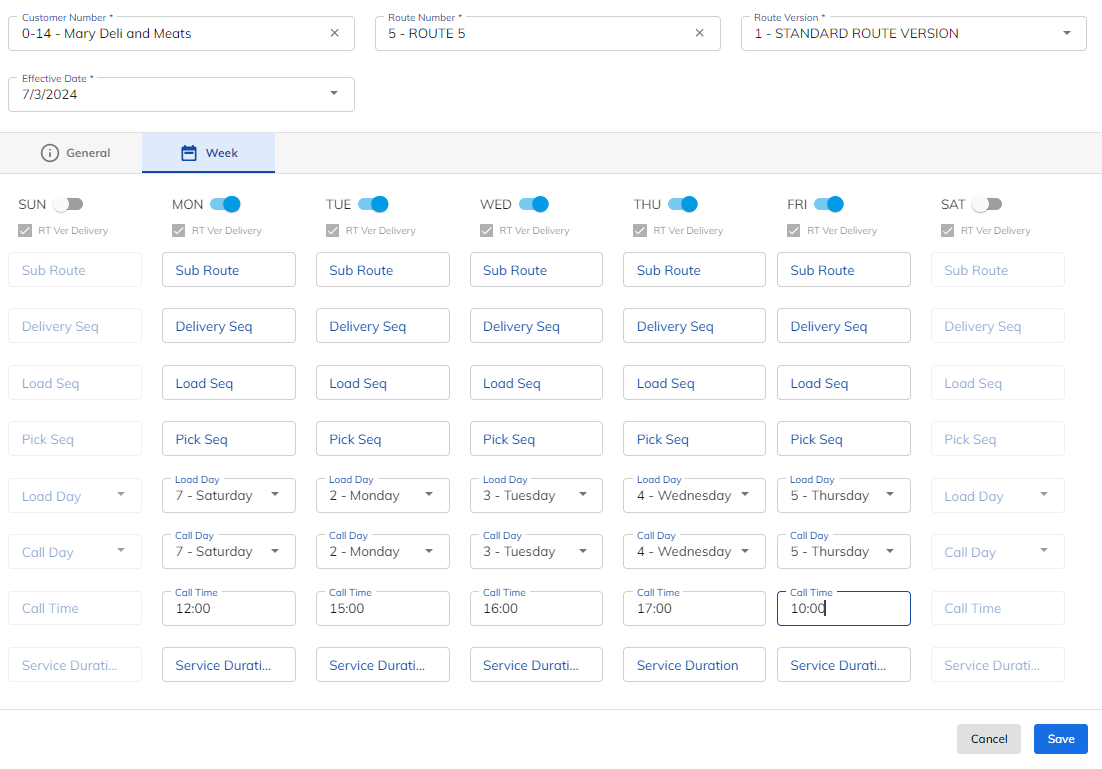
Entry Fields on the Week Tab
Field | Mandatory? | Description |
|---|---|---|
Delivery Days | Yes | Select the Delivery Days – Sunday through Saturday. Only days that the route delivers can be selected. |
Sub Route | No | Enter a Sub Route for each delivery day. |
Delivery Sequence | No | Enter a Delivery Sequence for each delivery day. |
Load Sequence | No | Enter a Load Sequence for each delivery day. |
Pick Sequence | No | Enter a Pick Sequence for each delivery day. |
Load Day | Yes | Enter the Load Day for each Delivery Day. |
Call Day | Yes | Enter the Call Day for each Delivery Day. |
Call Time | Yes | Enter a Call Time for each Delivery Day. |
Service Duration | Yes | Enter a Service Duration for each Delivery Day. |
Press Save.
Once Save has been selected, the Chain and/or Customer Number now appears on the Route Version.