
Authorization Group Maintenance
This article shows how to use Authorization Groups in xRMS. Authorization Groups control which items a customer may or may not order in Order Entry. It covers creating the code, creating and populating a group, adding and deleting items, deleting a group, assigning a group to a customer, and how the group is enforced in Order Entry.
About Authorization Groups
Authorization Group Maintenance allows additions, changes, and deletions to the authorization files RMATHP and RMATDP. The user may create an authorized or unauthorized group along with the corresponding detail items. While the application does allow for the creation of template and feature groups, these are for future enhancements.
Authorization Groups are used within the Order Entry Program. If a customer is attached to an Authorization Group, he may only order items within the specified Authorization Group.
Unauthorized Groups are used within the Order Entry Program. If a customer is attached to an Unauthorized Group, he MAY NOT order the items within the specified group.
The application requires the existence of the code number in the code file under code AG.
Non-System Code Type Setup
In order to populate an authorization group, the authorization group number must first be created in the code file. The application is normally located in the xRMS Control Menu.
Code Type Maintenance – Creating a New Authorization Group
Select Main Menu.
Select Control Menu.
Select Code Type Maintenance. The following screen will display.
Code Type Maintenance – Main Screen

Enter the code type AG in the Code Type field. The following screen will display.
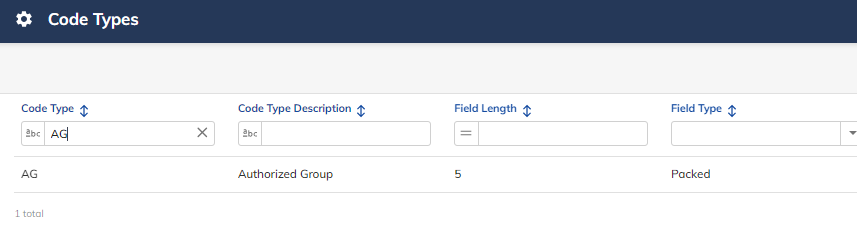
Select the + Add button.
Populate the fields below.
Press the Save button to save the newly created Authorization Group.
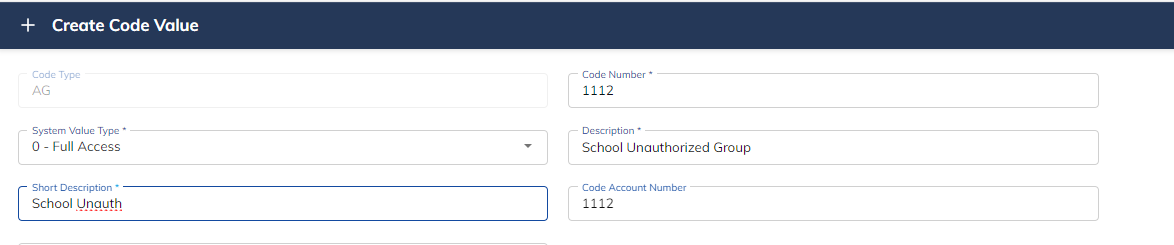
Field | Recommended / Notes |
|---|---|
CODE NUMBER | The new value for the code number. |
DESCRIPTION | The long description associated with the new code number. |
SHORT DESCRIPTION | The short description associated with the new code number. |
CODE ACCOUNT NUMBER | This field is used for the G/L interface and should be populated with the appropriate G/L account number if used. |
Code Type – Code Value "AG 1112" has been added to the Code File

Authorization Group Maintenance – Creating an Authorization Group
Once the necessary codes are created in the code file, the next step is to create the authorization group and populate the items. The process is performed by launching the Authorization Group Maintenance application, which is normally located on the Customer Menu.
The process of creating a new group and populating the items is identical for all authorization types. This document will focus on the creation of an authorized list.
Select xRMS Main Menu.
Select Customer Menu.
Select Authorization Group Maintenance.
Select the + Add button.
Populate the fields below.
Press the Save button to save the newly created Authorized Group.
Authorization Group Maintenance
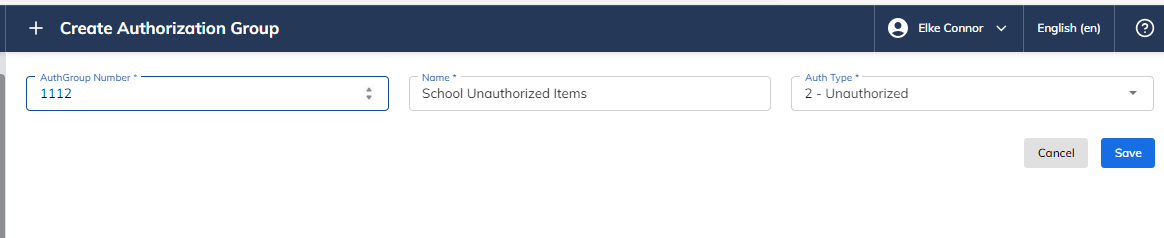
Field | Recommended / Notes |
|---|---|
Authorization Number | Select the newly created Authorization Group number from the list of "AG" from the Non-System Code Type. |
Name | Enter the Authorization Group Name. |
Auth Type | Select an Authorization Type: |
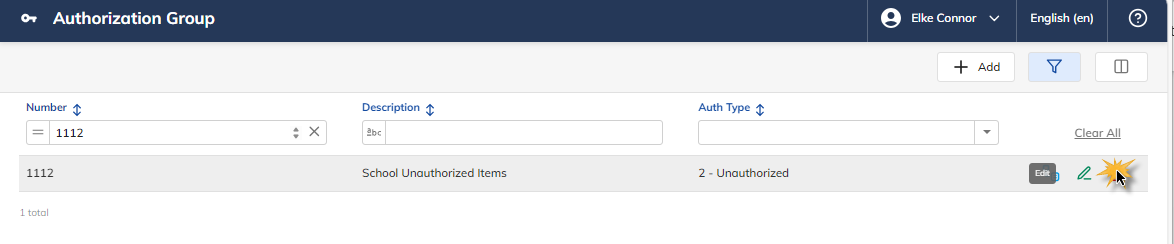
Once the Authorization Group has been created, select the Authorized group to begin adding items to.
Authorization Group Maintenance – Adding Items to an Authorization Group
Populate the fields below.
Press the Add button after each item entry to save the item to the authorization list.
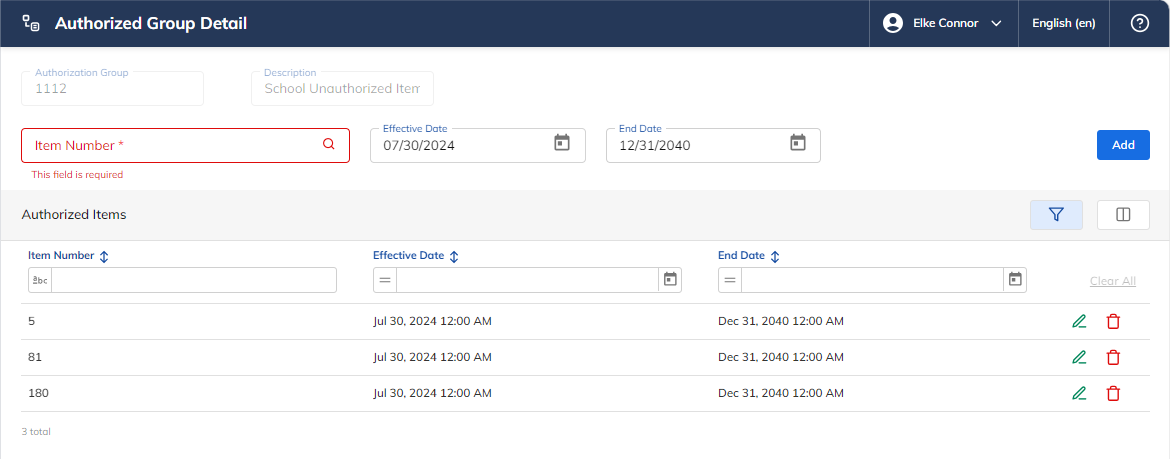
Field | Description |
|---|---|
item | Allows for the entry of the item number. Note the "Look-Up" button next to the field. Selecting this function will display a browse list allowing the user to select the item number. |
eff-date | Allows for the entry of the effective date for this item. Note the "Calendar Look-Up" button next to the field. Selecting this function will display the standard date selection screen. |
end-date | Allows for the entry of the ending date for this item. Note the "Calendar Look-Up" button next to the field. Selecting this function will display the standard date selection screen. |
Authorization Group Maintenance – Deleting an Item from an Authorization Group
This section explains how to delete a specific item for a specific group.
Select Main Menu.
Select Customer Menu.
Select Authorization Group Maintenance, then select the group to make the change to.
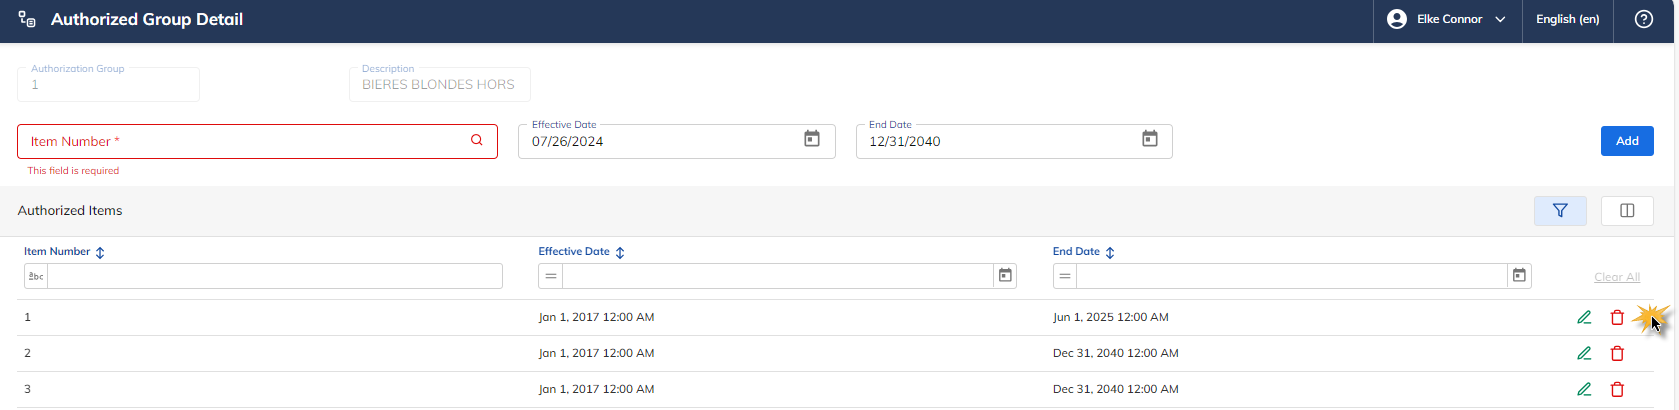
Find the item to delete and press the Delete button.
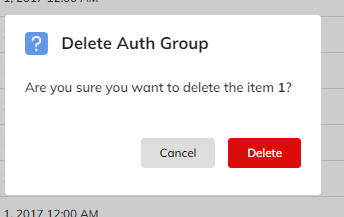
The question will appear, "Are you sure you want to delete the item 1". Select Ok to delete the item or select Cancel to keep the item.
Authorization Group – Deleting an Item
Authorization Group Maintenance – Deleting an Authorization Group
This section explains how to delete a group. Note that the application will validate that there is no customer attached to the selected group.
Select xRMS Main Menu.
Select Customer Menu.
Select Authorization Group Maintenance, then find the group to delete.
Find the group to delete and press the Delete button.
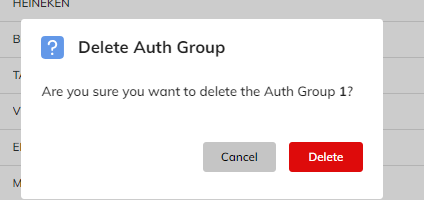
The question will appear, "Are you sure you want to delete the Auth Group 1". Select Ok to delete the group or select Cancel to keep the group.
Authorization Group – Deleting a Group

Customer File Maintenance – Add Authorization Group
Select xRMS Main Menu.
Select Customer Menu.
Select Customer File Maintenance. The following screen displays.
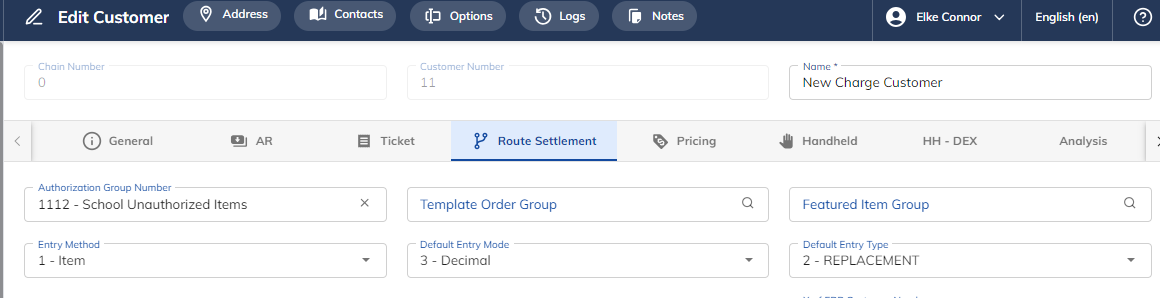
Select the field Authorization Group Number and enter the Group Number.
Press Save to save the Authorization Group Number to the Customer File.
The Template Order Group and Featured Item Group are on the Route Settlement tab as well.
Customer File Maintenance – Route Settlement tab
Order Entry
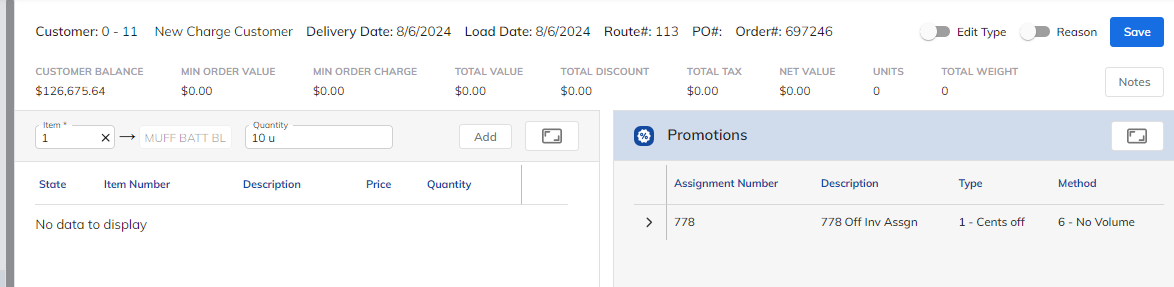

Customer 11 belongs to an Authorization (Unauthorized) Group and Item 1 is on the Unauthorized list; therefore, Item 1 cannot be entered into Order Entry.