Create a Manual Sale
This article shows how a user can create a manual sale in Sales Entry. It covers selecting the customer, entering the ticket, route, and date details, adding items and quantities, and saving the sale so it appears in the sales file.
Create a Manual Sale
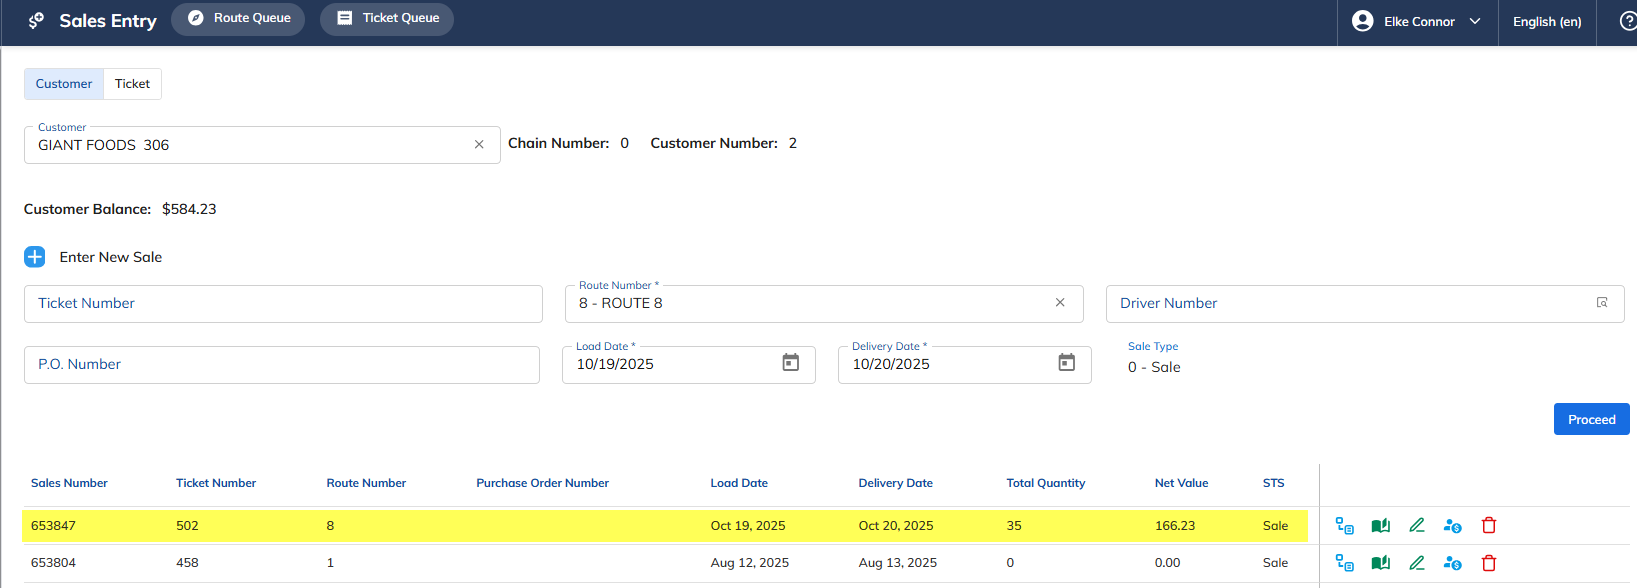
Select Sales Entry from the Sales menu option.
Enter the Chain and/or Customer Number to enter a manual sale for.
Enter the manual ticket number, OR if the user presses Enter, the system automatically uses the next ticket number available on the system.
Enter the Route Number (mandatory).
Enter the Driver Number.
Enter the PO Number, if required.
Enter the Load Date (MMDDYYYY).
Enter the Delivery Date (MMDDYYYY).
Select the Sales Type.
Select Proceed. Once you select Proceed, you will be brought to the following screen.
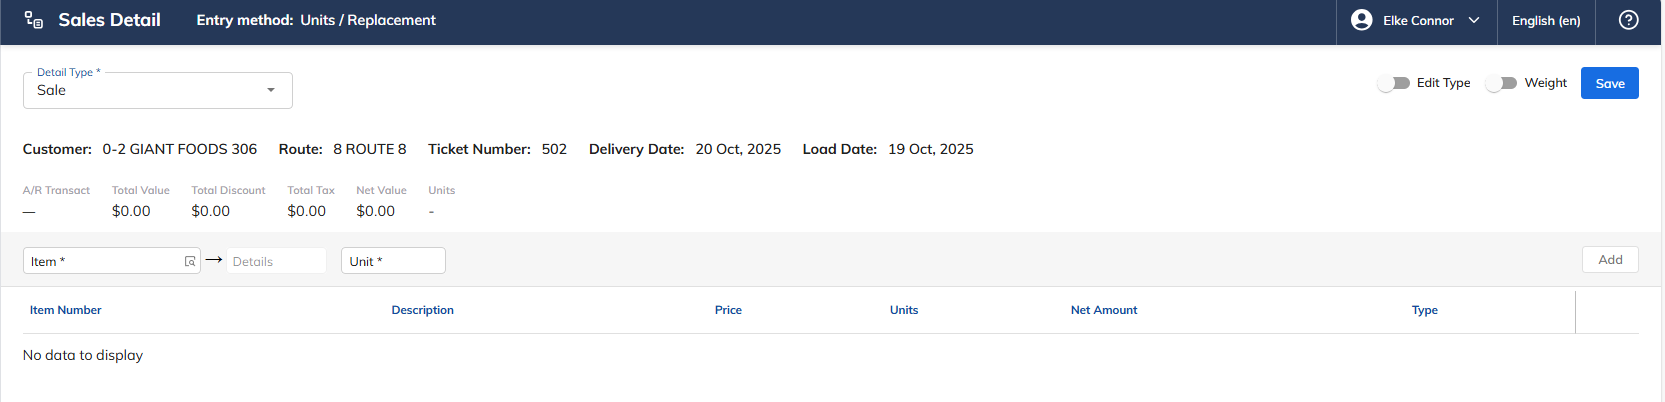
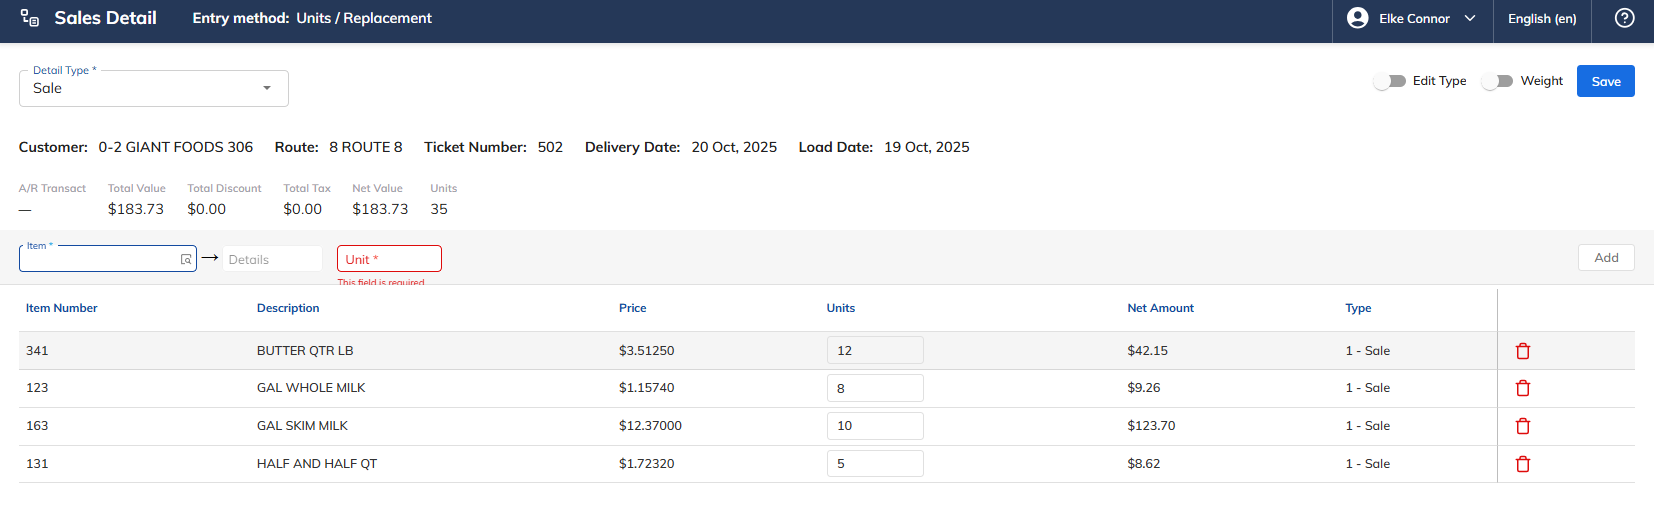
Enter the Item Number to be ordered.
Enter the quantity of the Item Number to be ordered (Cases, Units, Cases and Units).
Press Add after EACH item and quantity entered.
Press Save once you have entered all the items on the sale.
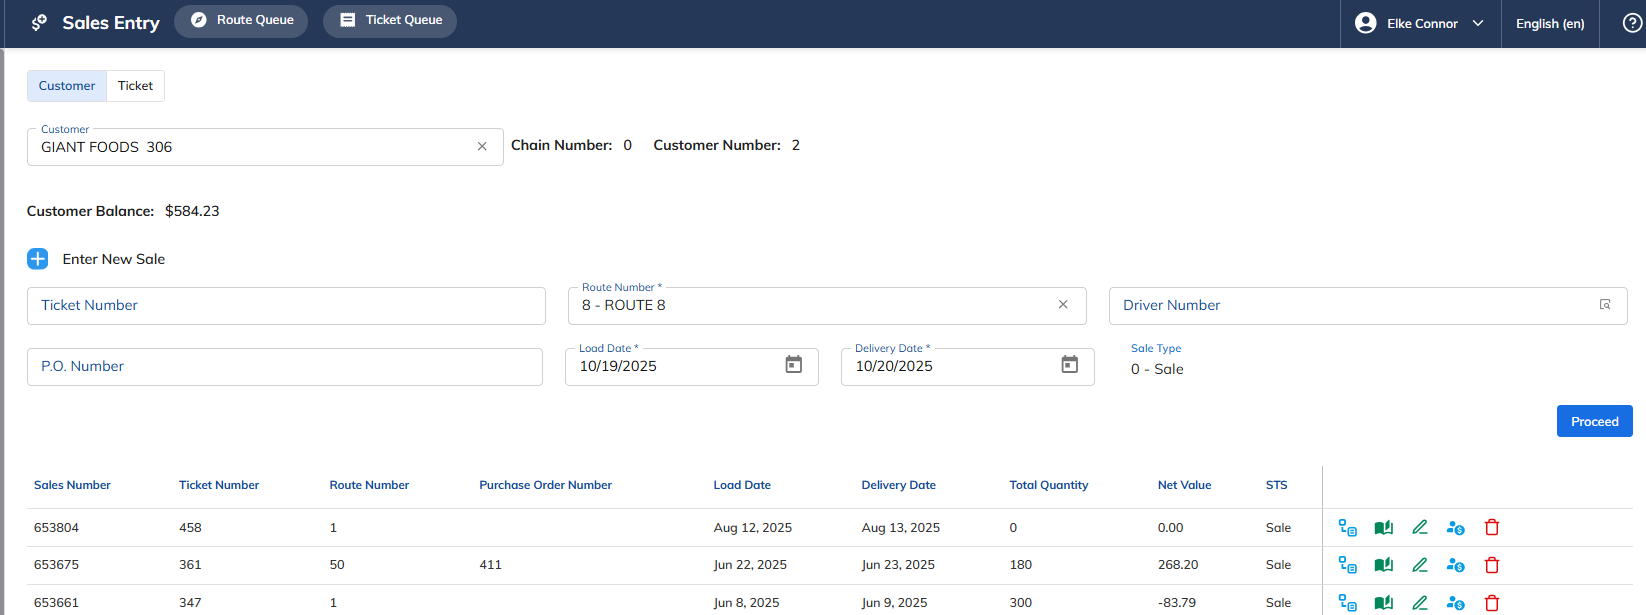
Once the user saves the sale, it appears in the sales file (example below), showing the following:
Sales Number – the sale is now assigned a Sale Number.
Ticket Number – the sale is now assigned a Ticket Number.
Route Number – the sale is now assigned to a Route Number.
Purchase Order Number – if a PO Number was entered, it would display here.
Load Date – the sale has a Load Date (MMDDYYYY).
Delivery Date – the sale has a Delivery Date (MMDDYYYY).
Sales Quantity – the sale displays a total quantity.
Net Value – the Net Value of the sale is displayed.
Sales Type – the Sales Type is displayed.